


Blog navigation

 0
0
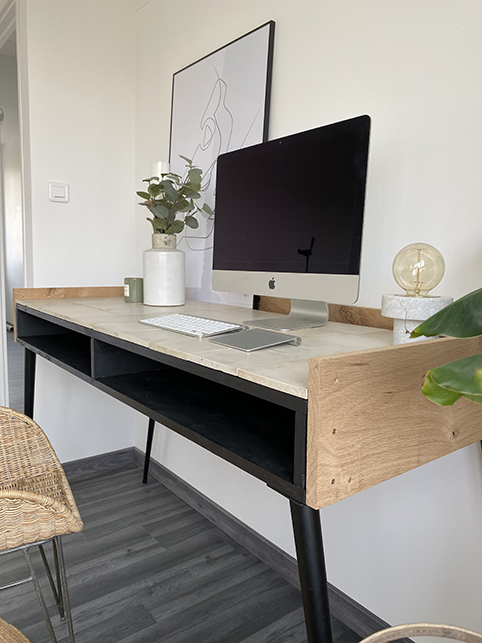
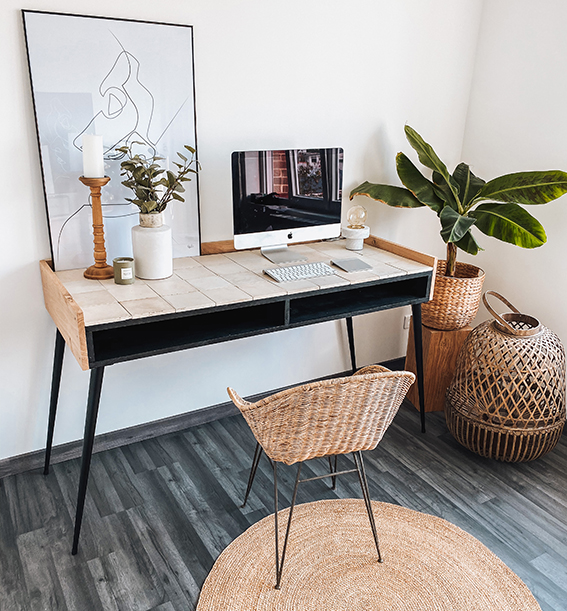
A desk has become essential in 2021. It comes in all shapes, sizes and styles. In this DIY, we present to you a DIY desk made using a conical foot, reclaimed cement tile, and wooden planks. It includes a box where you can slip mouse, keyboard or files. Let's go for the DIY imagined by Stéphane from the Instagram account @coconuts_deco, let's start with the material.
EQUIPMENT
- 2 large boards 80 cm x 200 cm x 2 cm
- 3 small boards 80 cm x 10 cm x 2 cm
- 18 Wooden dowels
- Wood glue
- A screwdriver
- A mallet
- Black paint
- A small roller of paint
- 4 conical legs 71 cm
- 16 hinge screws 20 mm
- 1 large oak plank 196 cm x 15 cm x 2 cm
- 2 small oak planks 80 cm x 15 cm x 2 cm
- Double-sided tape
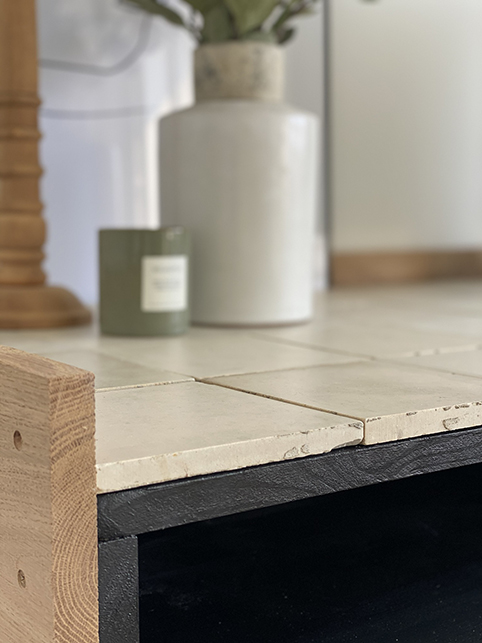
- 40 Cement tiles of 20 cm x 20 cm
DIY PROCESS
STEP 1
Take the 2 large boards of 80 cm x 200 cm x 2 cm and draw a line in the direction of the width at 1 cm from the edge of the 2 sides. Drill, with the screwdriver, 3 holes along this line: 1 at the bottom, 1 in the center and one at the bottom. They will be used to accommodate the wooden dowels. There must be 3 lines: one at each edge and one in the center.
STEP 2
Take the 3 small boards 80 cm x 10 cm x 2 cm and drill 3 holes, with the screwdriver, on the edge, respecting the same distance as those of the large board.
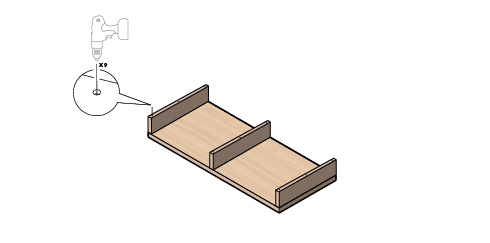
STEP 3
Take the first large 80 cm x 200 cm x 2 cm board and position it with the hole facing you. Secure the wood dowels by applying glue to the holes and hammering them in with the mallet. Repeat this step on all the holes of this board.
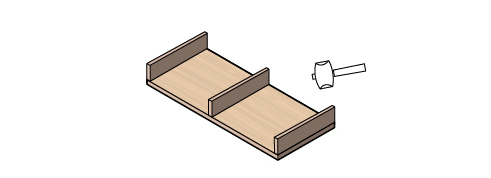
STEP 4
Put a little glue on the wooden dowels and place over the 3 small pre-drilled boards: one on the left, one in the center and one on the right. Using the mallet, gently tap the boards so that each small board is fully embedded on the large one.
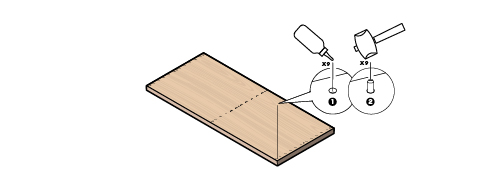
STEP 5
Make 3 holes on the other side of the slice of the 3 small boards that make up the sides, always keeping the same measurements as step 1.
STEP 6
Put wood glue in the holes and drive in the wood dowels using a mallet.
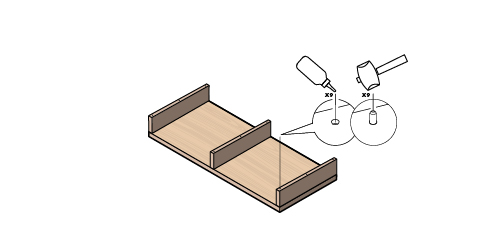
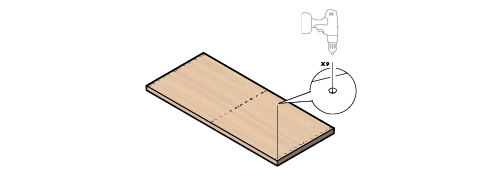
STEP 7
Take the second large board of 80 cm x 200 cm x 2 cm and align the holes previously made on the wooden dowels coming out of the small boards that make up the sides. Make sure that the large plank is properly fitted onto the 3 small planks then allow to dry in order to ensure the fixing of the box.
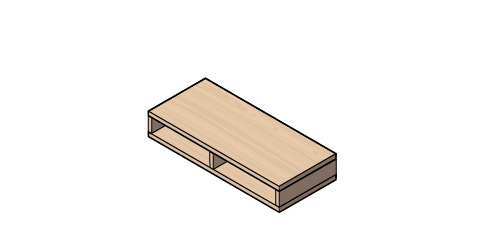
STEP 8
Using the paint and the small roller, paint the inside of the cabinet, the underside and the edges. It is not necessary to paint the top and sides as these parts will be covered. Then leave to dry for the indicated time.
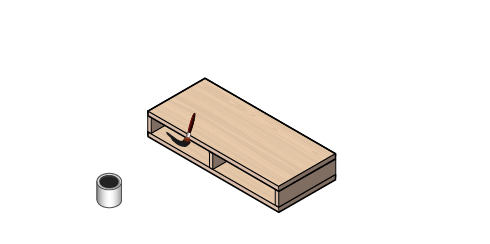
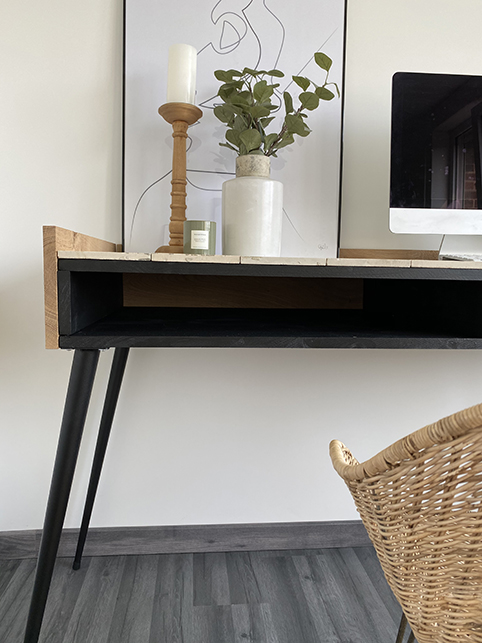
STEP 9
Place the box upside down (black face under your eyes), position a conical foot at each corner of the box (with the tip of the foot outward) and secure each conical foot using 4 hinge screws of 20 mm and a screwdriver.
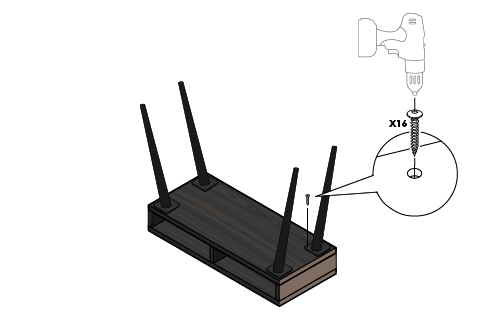
STEP 10
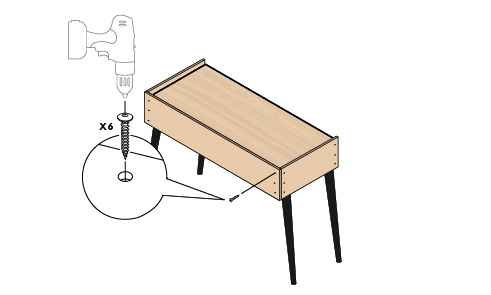
Turn the box over by positioning it on its feet and take the 2 small oak boards 80 cm x 15 cm x 2 cm
You will fix these 2 boards on each side of the box, aligning the bottom of the oak plank with the bottom of the box.
Tips: with a milling head, you can pre-drill in order to hide the screws later
STEP 11
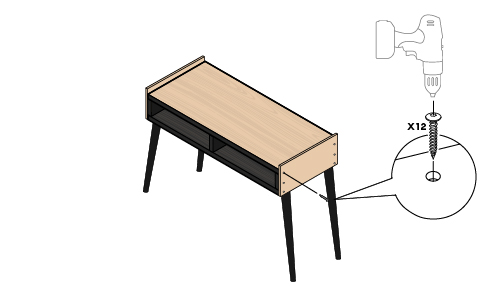
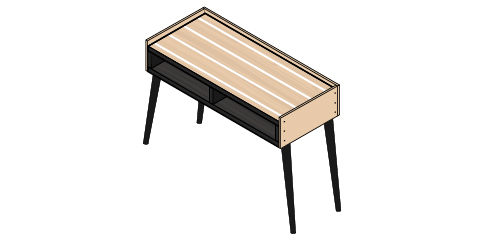
Come and fix the large oak plank 196 cm x 15 cm x 2 cm at the back of the box, while lining up on the edge of the box.
STEP 12
With your double-sided tape, cut and position 5 pieces lengthwise of the box. The first 4 are to be placed 10 cm from the edge starting from the bottom. The last piece should be placed 2 cm from the edge.
STEP 13
Remove the protection of the tape and come and place your cement tiles. Apply pressure on each tile so that they adhere correctly with double-sided tape.
Astuce : you can completely transform this desk according to the cement tiles that you have, it will then be necessary to modify the dimensions of the boards to adapt the desk.
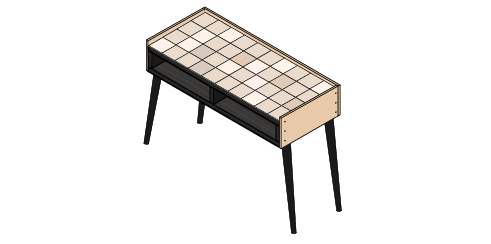
THE RESULT
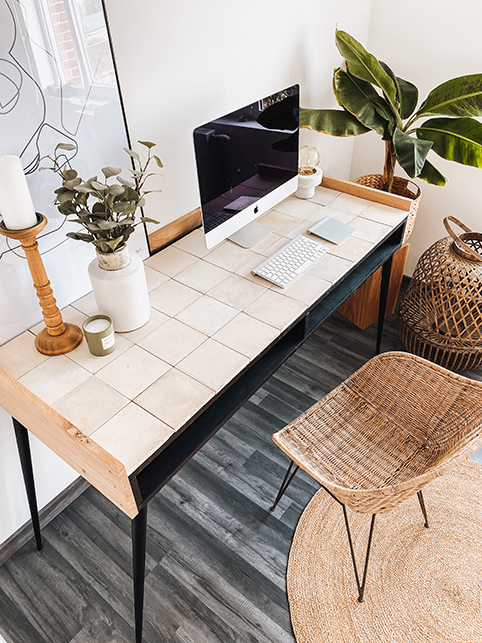
This office inspires you and to go even further, check out 12 different office ideas. And come take a look at our latest DIY to make an outdoor table with floor boots.
Related posts
-
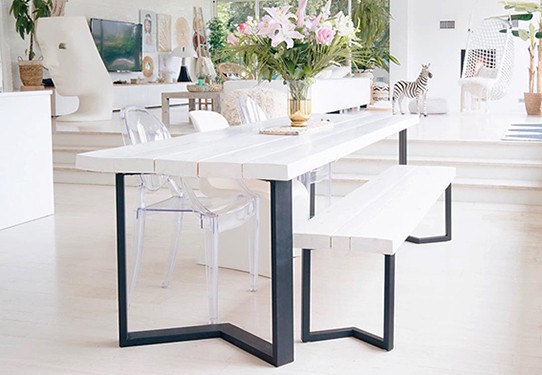
 HOW TO MAKE YOUR DINING TABLE YOURSELF?
The dining table is one of the centerpieces of the house, it will give character to your interior and will...
HOW TO MAKE YOUR DINING TABLE YOURSELF?
The dining table is one of the centerpieces of the house, it will give character to your interior and will... -
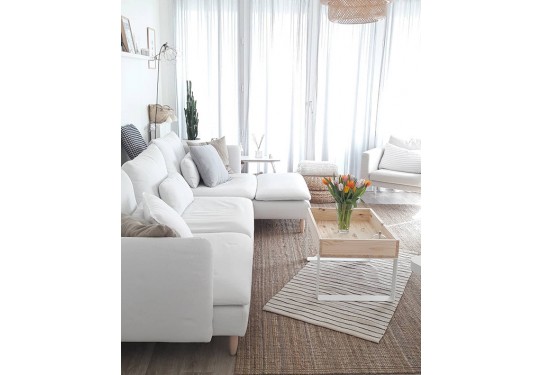
HOW TO MAKE A COFFEE COFFEE TABLE?
The coffee table is the center of the living room, where your evenings with family and friends will take place, where...
-
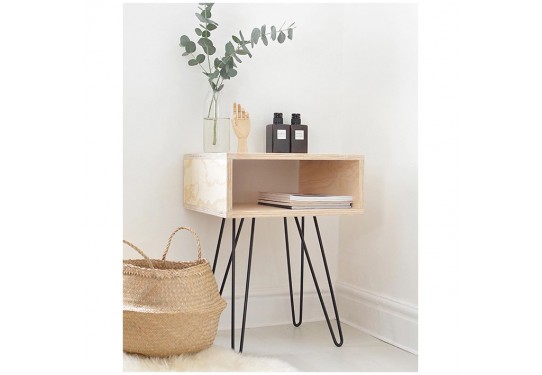
HOW TO MAKE A BEDSIDE TABLE WITH A BOX?
Are you desperately looking for a bedside cabinet without finding what you are looking for? We are offering you a DIY...
Leave a comment