


Blog navigation

 0
0
Anne from account @moncoinvintage imagined and made a 2m20 by 1m table for its exterior. She made her top and put the legs to her liking to have a table with an aged, raw but also rusty look.
MATERIAL
- 5 oak planks 2m20 x by 20 cm and 28 mm thick
- 7 cleats flat iron steel 6mm thick and 3.5 cm wide and 98 cm long
- Fixing screws for cleats
- 20 shims 5mm thick
- Straps
- Glass Jar
- Vinegar
- Fine steel wool
- Marine Varnish
- 2 thick flat iron 71 cm gross
- 16 paint screws 45 mm
- Acetone
- Vaporizer
- Hydrochloric Acid
DIY RUN
STEP 1
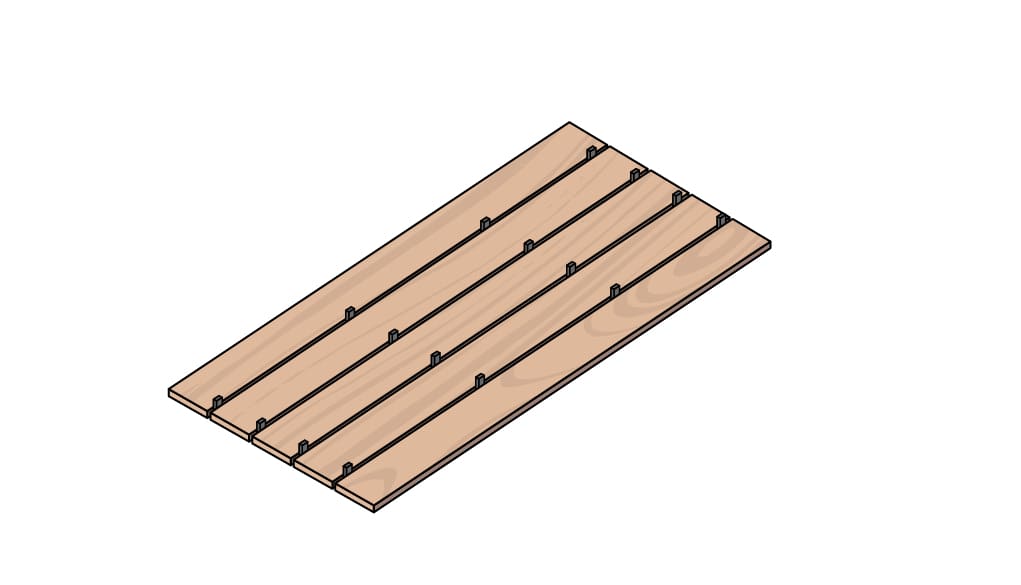
Let's start by creating the spaces between the boards. This will prevent the wood from rotting over time by letting water stagnate on the whole. For this, use 5mm wooden wedges, to be inserted lengthwise.
Position 4 wedges between 2 boards lengthwise and hold the assembly together using straps. Repeat the operation until you have the 5 boards next to each other.Be sure to do this step on a straight, level floor to avoid positioning differences once the board is flipped over.
Tip:if you don't don't have big enough straps, step 1 and 2 can be mixed by strapping then attaching 2 boards, adding a new one, etc. To do this, start by placing your 2 planks on the ground, then position the cleats perpendicularly on top. Sketch their location and let's go for the straps step.
STEP 2
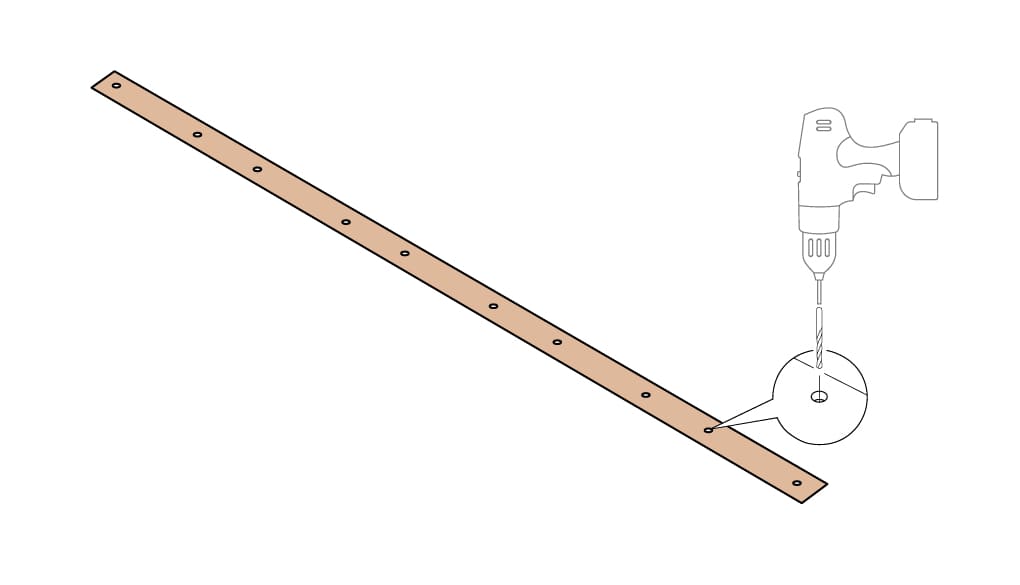
Prepare the cleats by drilling them with a metal drill bit at the level of the future fixings. To be sure, do not hesitate to arrange them on your board to make sure of the location of the holes, following the next step.
STEP 3
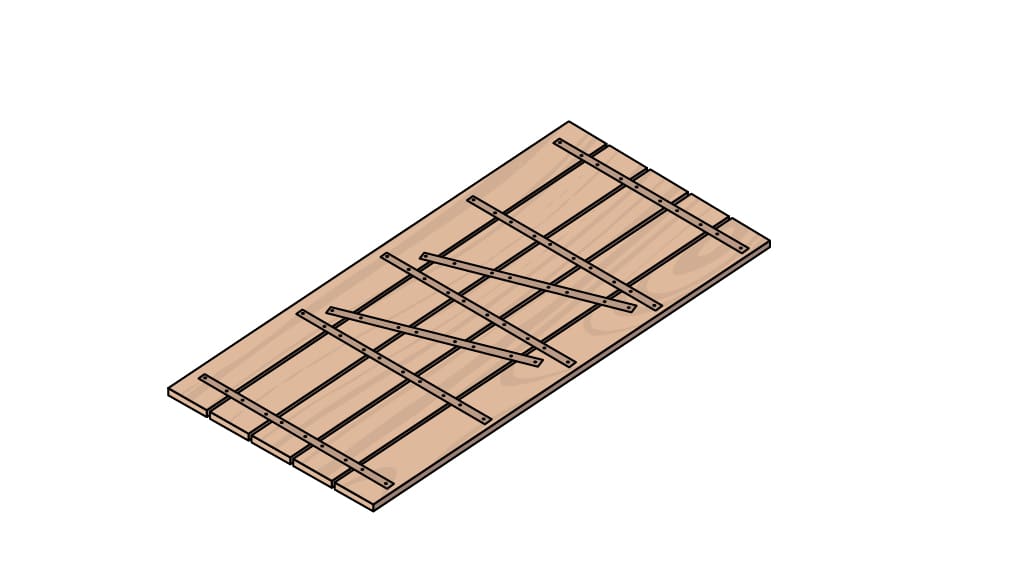
7 cleats are needed:
- 2 are to be placed in order to create 3 equal separations in length
- 2 are to be fixed 12 cm from each end of the finished top
- 1 is to be fixed in the center
- 2 are to be fixed diagonally, between the other cleats in order to create Z
For cleats across the width, offset them 1 cm from the bord then fix them, with 2 screws, on each board at the end.
Tip:steel cleats can be replaced by wooden cleats. In this case, take the same wood for cleat and plank because each wood works and reacts differently to humidity, heat and the like. This will prevent the entire board from twisting over time.
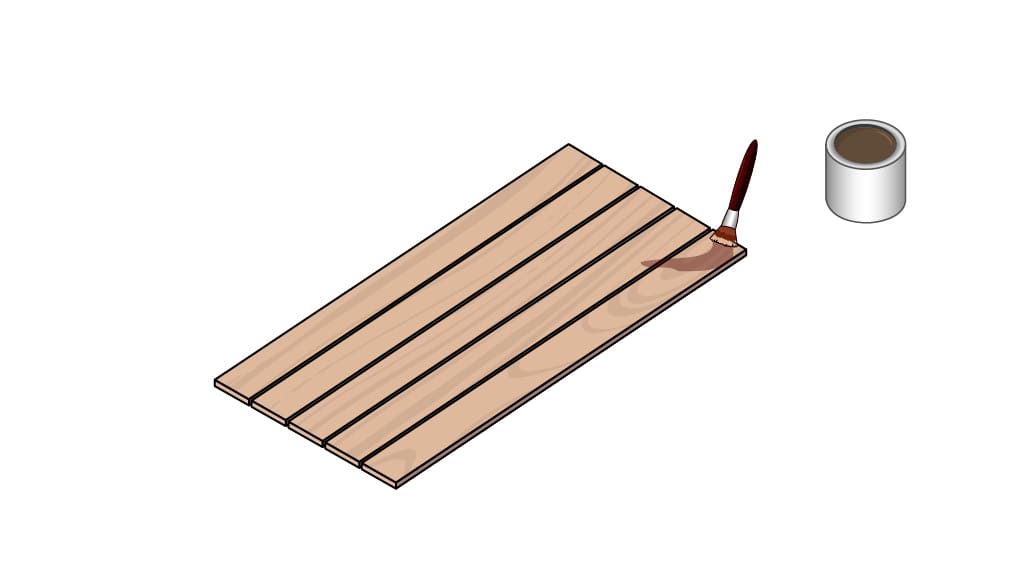
STEP 4
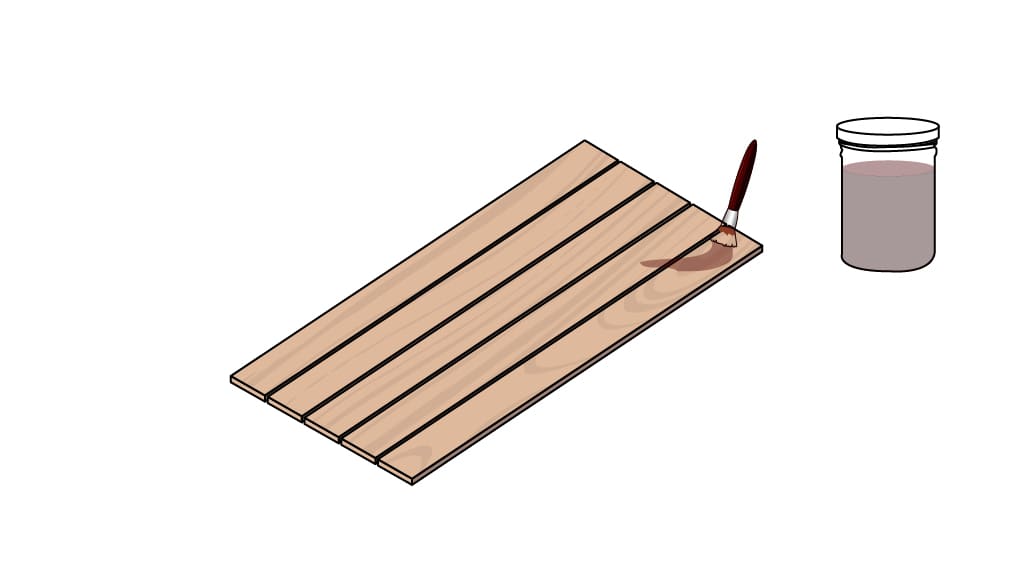
Your deck is ready to be tinted. Here, the idea is to gray the wood naturally with vinegar and a pad of fine steel wool. So let's prepare the mixture that will be useful for the next step.
For this, in a glass jar, mix 1 liter of white vinegar with 1 pad of fine steel wool. Beforehand, clean the steel wool with soap and water.
Leave to macerate for 3 to 7 days, for the vinegar to take effect and dissolve the steel wool. If desired, shake occasionally to speed up the process. The intensity of the color depends on the maceration time: the longer it macerates, the more pronounced the color will be.
See the tip in PERMANENT STORY on the Instagram account of @moncoinvintageif needed.

STEP 5
To use this in-house finish, do some tests beforehand to make sure of the final color, under the top of the tray or a rest of wood of the same species.
If you find the tint too concentrated, mix it with the same amount of water.
1 coat may be enough depending on the desired effect. Wait between 2 coats to get the final look at the risk of rushing and getting a final result that is too dark.
STEP 6
Your tray has the expected shade, it's time to protect it with marine varnish and a brush. The particularity of this varnish is to have an almost matte finish. 3 coats are required. Wait the time indicated on the jar between 2 applications.
STEP 7
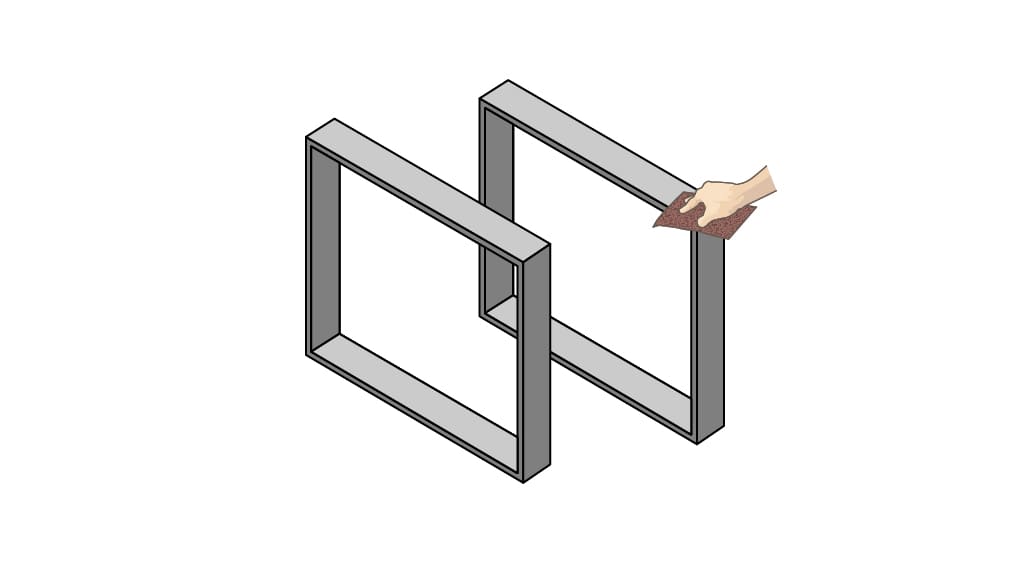
The top has a distressed look finish. In the same spirit, the legs chosen, thick flat iron 71 cm, must give the impression of having aged. So we're going to rust our feet.
It can be done by nature's process, leaving them outside unprotected. They will naturally rust.
Don't want to wait and see the effect quickly? Here's our tip: clean the feet with acetone to strip the grease. Be careful to protect your hands well and do this outdoors.
Then spray a mixture of water and hydrochloric acid with a ratio of 1/10: 1 l of water to 100ml of acid on the feet and let the magic happen. The legs will quickly rust. Here too, be careful to protect your hands and eyes from spraying.
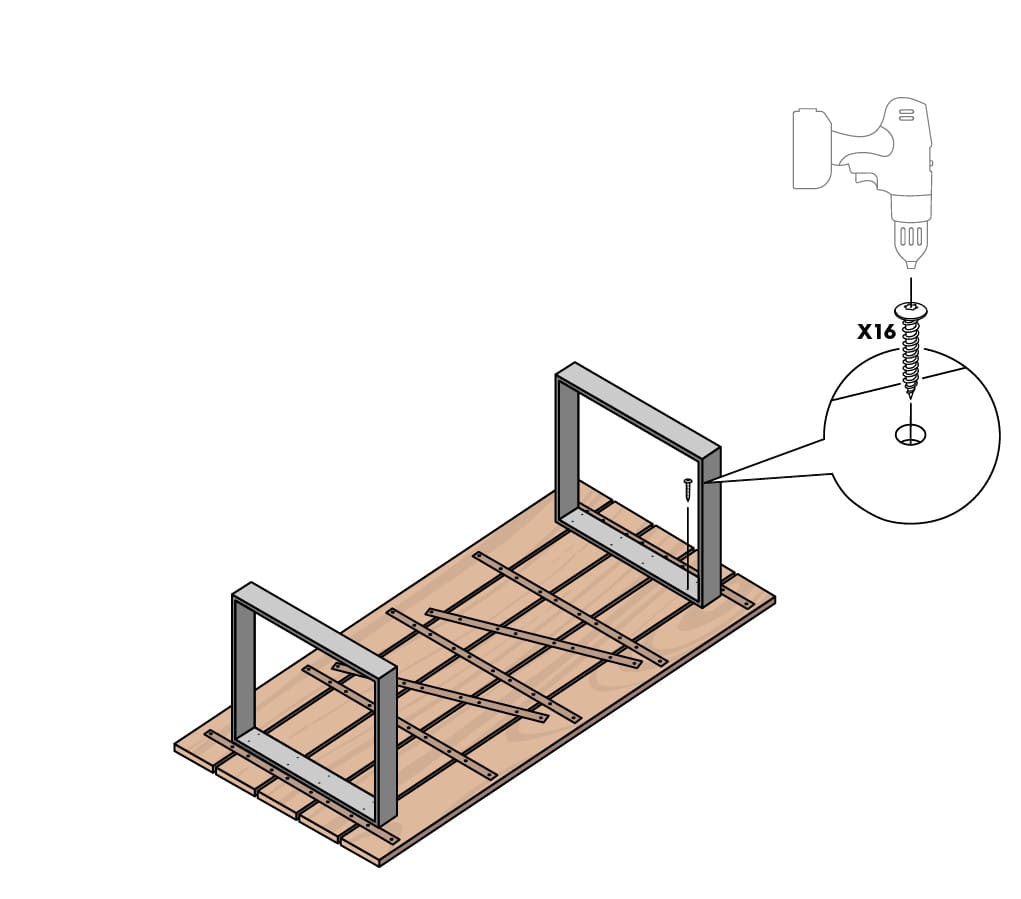
STEP 8
Once the feet are dry, position them on the back of the board, in the desired location, then screw them thick flat iron feet 71 cm using a screwdriver and 45mm hinge screws.
THE RESULT
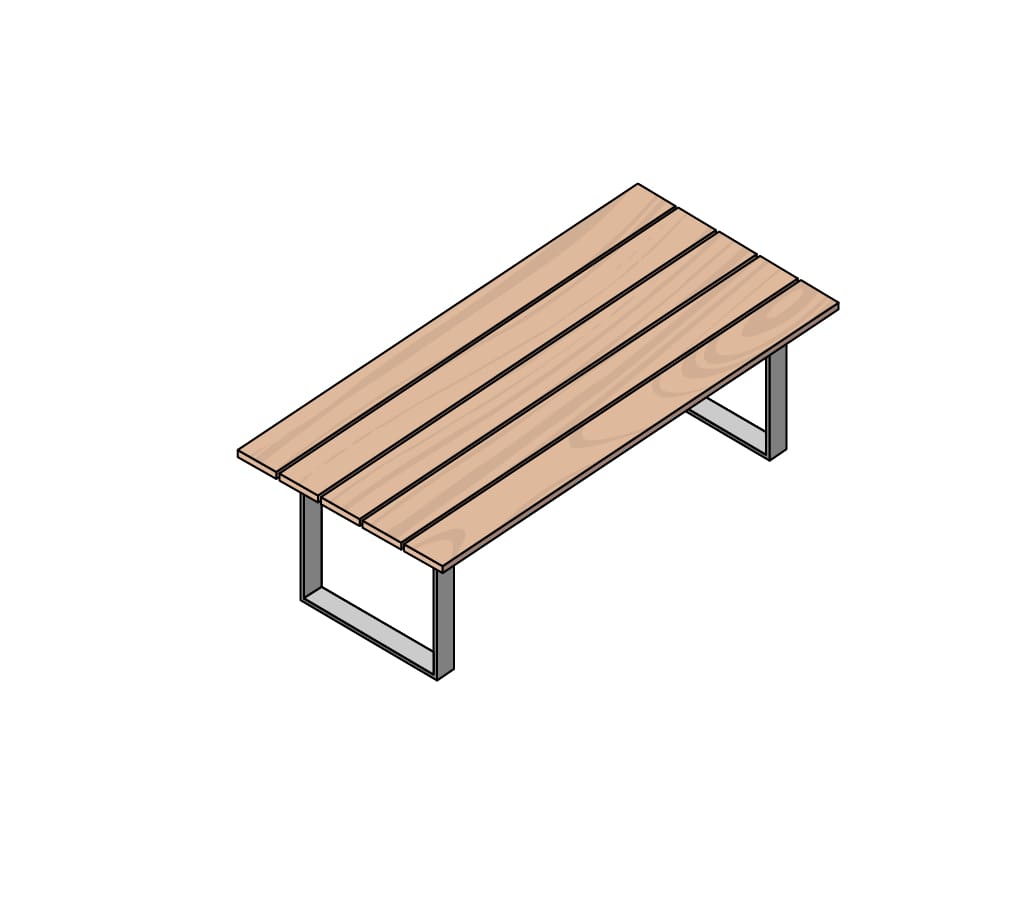
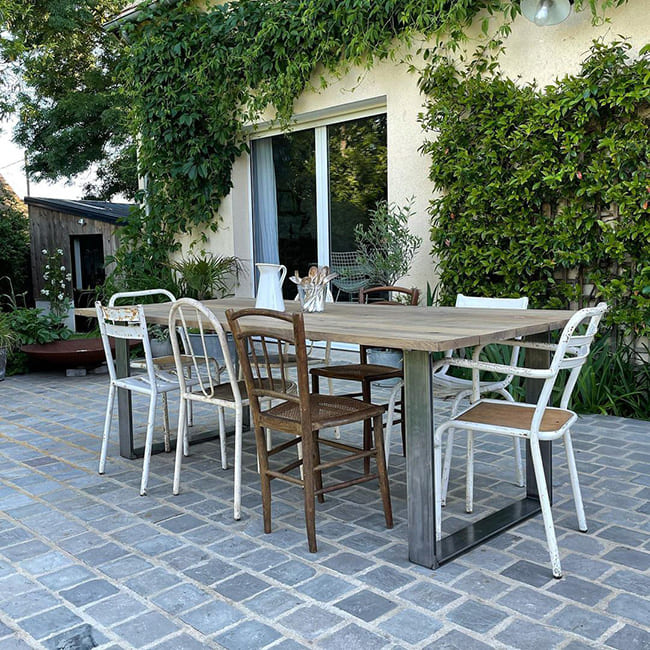
It is possible to customize your outdoor dining table to fit perfectly with the decoration of your terrace. There are different ways of customization through the top, the choice of legs or even thanks to the chairs and the decoration of your garden.
Related posts
-
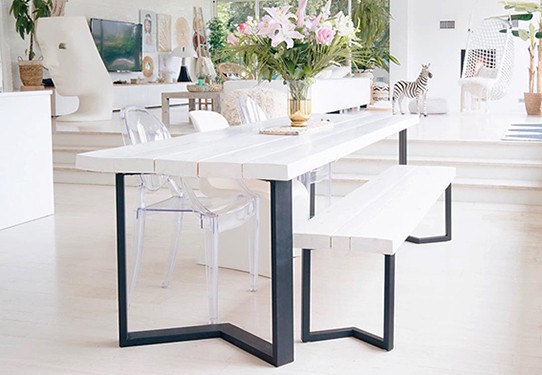
 HOW TO MAKE YOUR DINING TABLE YOURSELF?
The dining table is one of the centerpieces of the house, it will give character to your interior and will...
HOW TO MAKE YOUR DINING TABLE YOURSELF?
The dining table is one of the centerpieces of the house, it will give character to your interior and will... -
HOW TO MAKE A COFFEE COFFEE TABLE?
The coffee table is the center of the living room, where your evenings with family and friends will take place, where...
-
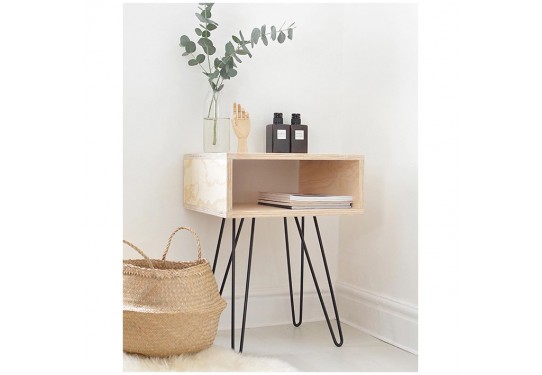
HOW TO MAKE A BEDSIDE TABLE WITH A BOX?
Are you desperately looking for a bedside cabinet without finding what you are looking for? We are offering you a DIY...
Leave a comment