


Blog navigation

 0
0
When composing furniture for a child's room, the choices are endless. From the most trendy, to the most practical, to the evolutionary piece of furniture, there is an embarrassment of choice. The advantage of an evolving piece of furniture is already that it will be modulated according to the needs related to the age of your toddlers and that in addition, there are no new purchases to consider. It's good for the wallet and the planet because we upcycle what belongs to you.
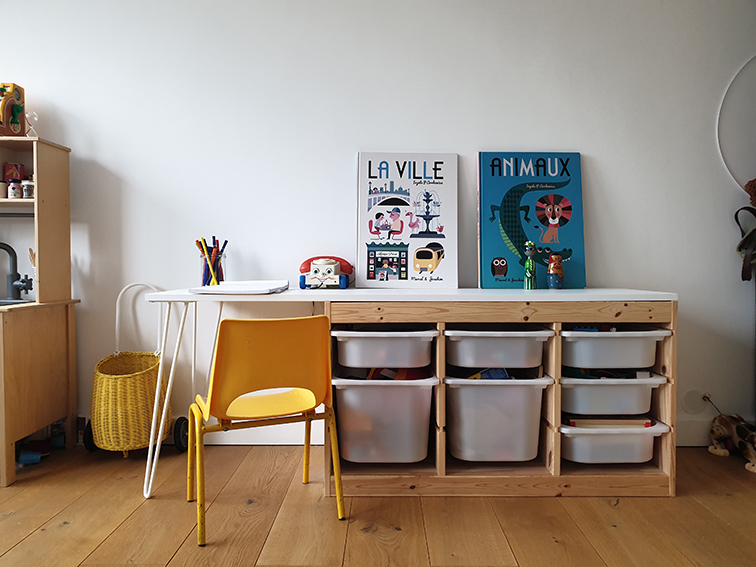
Thanks to this TROFAS storage unit, offered by the Swedish giant, let's imagine and create together a small office corner, play table with storage space for our favorite toddlers.
This piece of furniture was made by @grudwood_ste.
MATERIAL
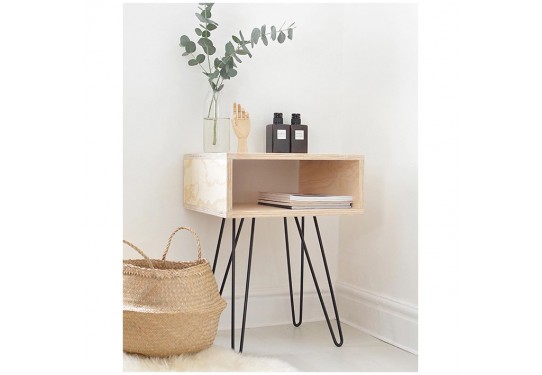
- 1 TROFAS pine cabinet 93x44x52 cm, pre-assembled
- 1 board 143 cm long, 44 cm wide and 2 cm thick
- 2 white hairpin legs of 44 cm
- 6 hinge screws of 15mm
- screwdriver
- 4 hinge screws of 20mm or wood glue
DIY PROCEDURE
STEP 1
We consider the TROFAS piece of furniture to be purchased and assembled. Let's take care of the board directly.
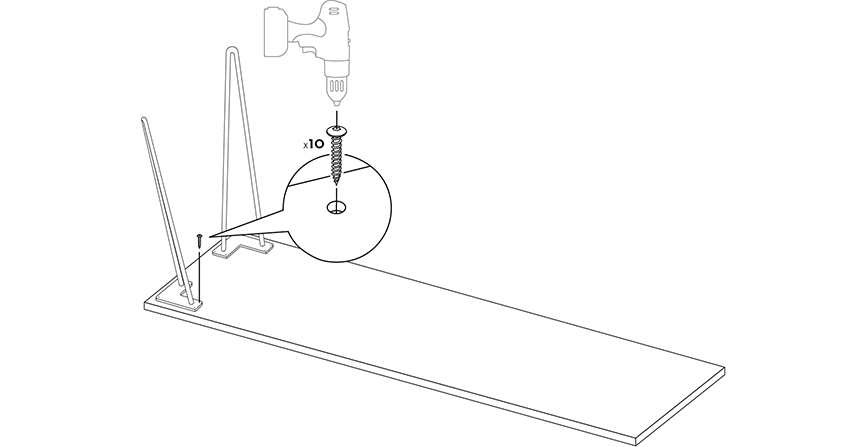
Lay it on its back so that you can see the side where the feet will be attached.
Position each white hairpin leg 44 cm at each angle on the same side of the board, in the direction of the width, by offsetting them by 2 cm in relation to the edge.
STEP 2
We offer 2 fixing methods. One is permanent while the other is not. The advantage of the first is that it corresponds more to an evolving piece of furniture. The second, on the other hand, corresponds more to a modular piece of furniture that can move from one room to another to change its use. Choose the one that suits you the most.
Method 1: Screw it
Screw the feet to the board using a screwdriver and the hinge screws. This will allow you to recover the board and the cabinet independently in the future.
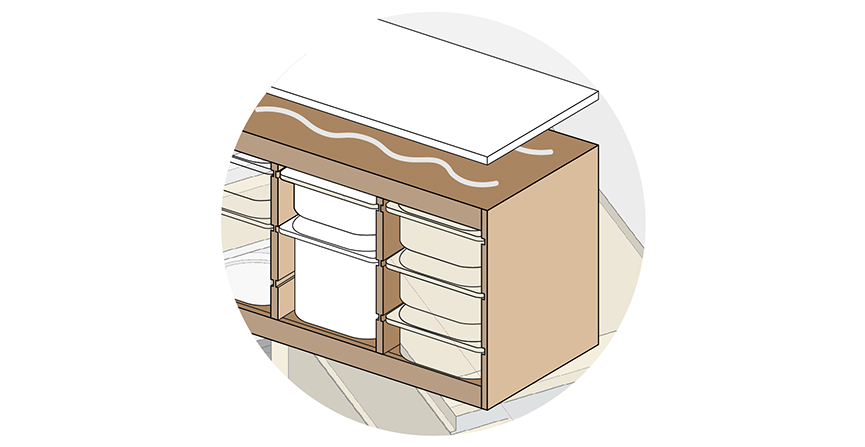
Simply turn the assembly over to place the furniture upside down. Screw the top and cabinet together by passing under the upper part of the cabinet. It is also possible to fix the edge of the top with the back of the cabinet using a bracket. Here, the whole will only be connected from the back. The advantage being that there are no visible holes on the furniture once the board is removed. On the other hand, it is to be avoided if your child likes to lift elements, at the risk of trapping their fingers..
Method 2: Gluing
Place glue on the part of the board in contact with the furniture and directly on the upper part of the furniture. Glue the 2 surfaces, making sure to align the corners of the top and those of the cabinet. The 2 elements are now indivisible.
BONUS
Play with the position of the board in relation to the furniture by creating, for example, an L-shaped set. Perfect for corner furniture. Or also by arranging the board from the middle of the cabinet to enlarge the desk / games table area.

Here you are with a 2-in-1 piece of furniture, adapted to your child's desires and age. This idea personalizes this well-known TROFAS piece of furniture and makes it unique. In the long term and depending on the fixing chosen, the top can be reused to create a teenager's desk. The legs will be used to create an outdoor coffee table, a bench or even a circular side table. While the storage cabinet regains its raw form and its initial function.
By varying the colors, there are many possibilities to adapt it to the decoration of your choice. !
We offer you another type of children's play table with this DIY and this oval tray.
If you like the idea of 2-in-1 furniture, discover our DIY TV cabinet and dressing table / desk for a bedroom or a small functional living room.
And if you are a fan of IKEA HACK, here is a DIY personalizing an IVAR piece of furniture.
Related posts
-
 HOW TO MAKE YOUR DINING TABLE YOURSELF?
The dining table is one of the centerpieces of the house, it will give character to your interior and will...
HOW TO MAKE YOUR DINING TABLE YOURSELF?
The dining table is one of the centerpieces of the house, it will give character to your interior and will... -
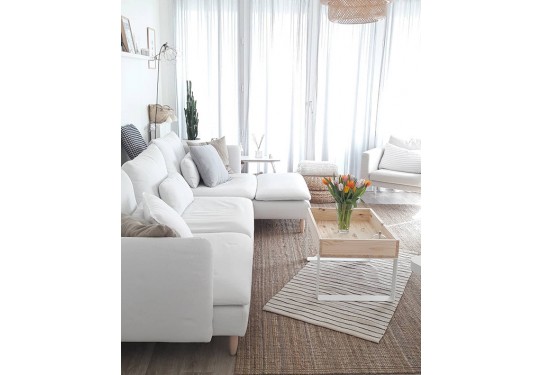
HOW TO MAKE A COFFEE COFFEE TABLE?
The coffee table is the center of the living room, where your evenings with family and friends will take place, where...
-
HOW TO MAKE A BEDSIDE TABLE WITH A BOX?
Are you desperately looking for a bedside cabinet without finding what you are looking for? We are offering you a DIY...
Leave a comment