


Blog navigation

 0
0
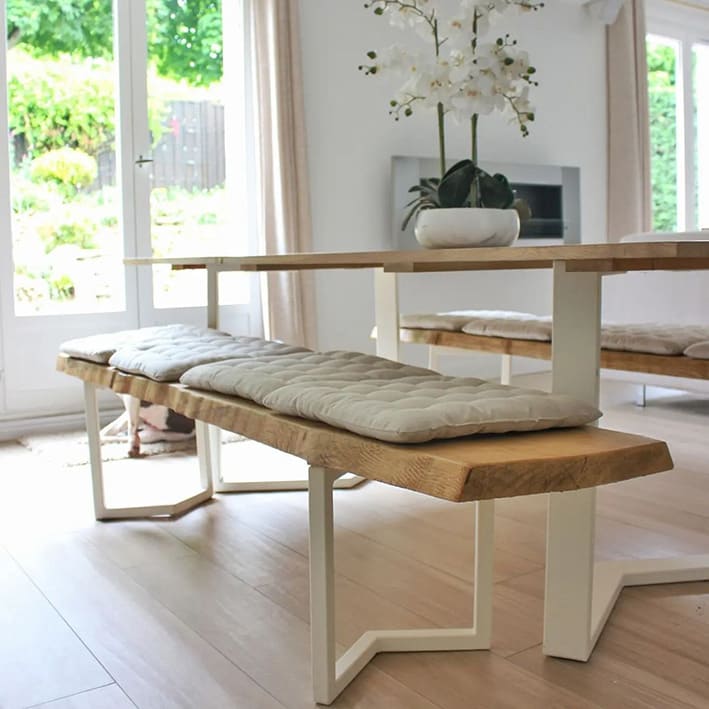
Following the purchase of a house and its renovation, Elodie from the Instagram account @elow.home called on La Fabrique des Pieds to design and manufacture the furniture for her dining room. She chose to make DIY on her dining table and benches for 2 reasons:
- She could not find anything that corresponded to her 100% in the trade
- DIY is a good way to control costs
By creating the table + 2 benches herself, the total is 900€ including the legs, the boards and all the accessories. The table will have cost him 472.5€ and the two benches 398€.
Something to seriously think about creating your own future dining table. In addition to that, nothing could be simpler to make it on your own. We explain in a few steps how to reproduce these DIY!
MATERIAL
- 5 oak planks 2m long, 20cm wide and 20mm thick
- 2 oak planks 2m long, 38cm wide, 38mm thick
- 2 feet M 71 cm
- 4 feet M 40 cm
- 16 hinge screws 20 mm
- 12 hinge screws 45 mm
- Screwdriver
- 3 wooden cleats 80 cm long
- Translucent varnish
- Brush
DIY PROCEDURE
STEP 1 – La table à manger
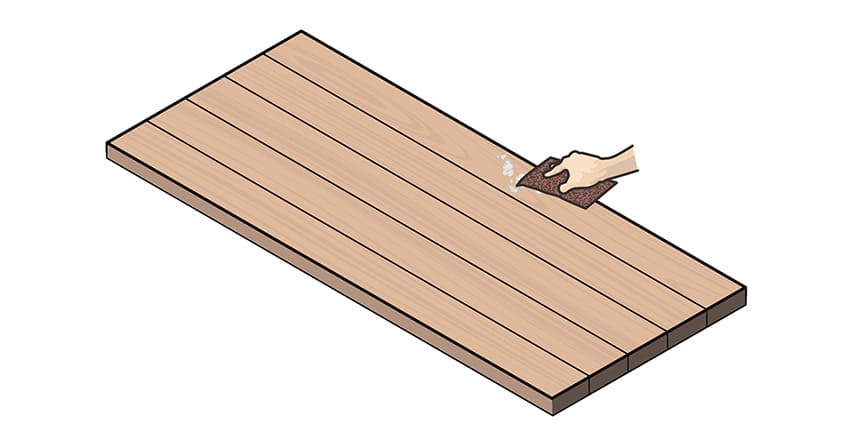
Arrange the 5 boards next to each other to choose the best layout that will become your final board.
Pay attention to the arrangement of the nodes to find a visual balance and an association that you like.
STEP 2 – The dining table
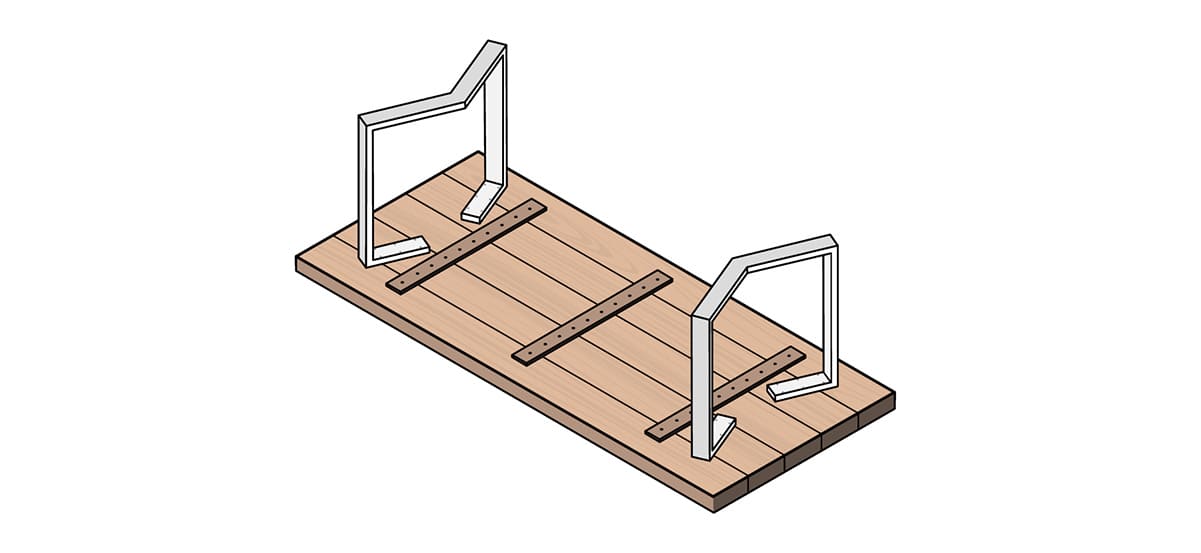
Turn the boards over to see the part where the feet will be fixed.
Measure the axis lengthwise and widthwise and place each foot M 71 cm 14.5 cm from each edge in the width and 30 cm from the edge in the length.
Tips : If your wood is dense, such as oak, consider pre-drilling by marking the location of the holes with a wooden pencil.

STEP 3 – The dining table
Add 2 wooden cleats in the direction of the width by arranging them near the foot towards the inside and a last one in the center.
STEP 4 – The dining table
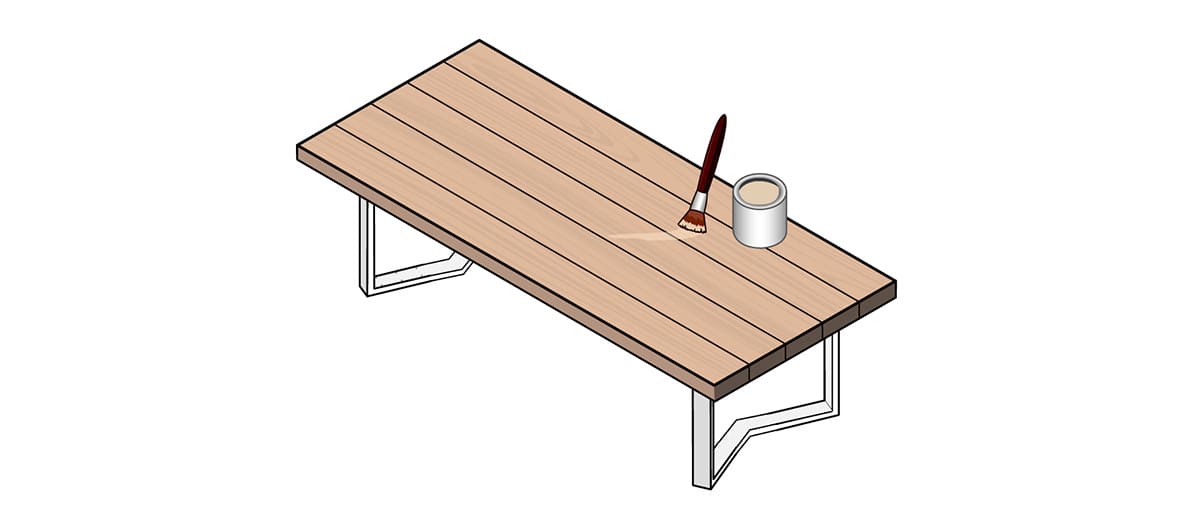
Protect the tray with a translucent varnish using a brush. Leave to dry for the indicated time.
STEP 5 – The bench
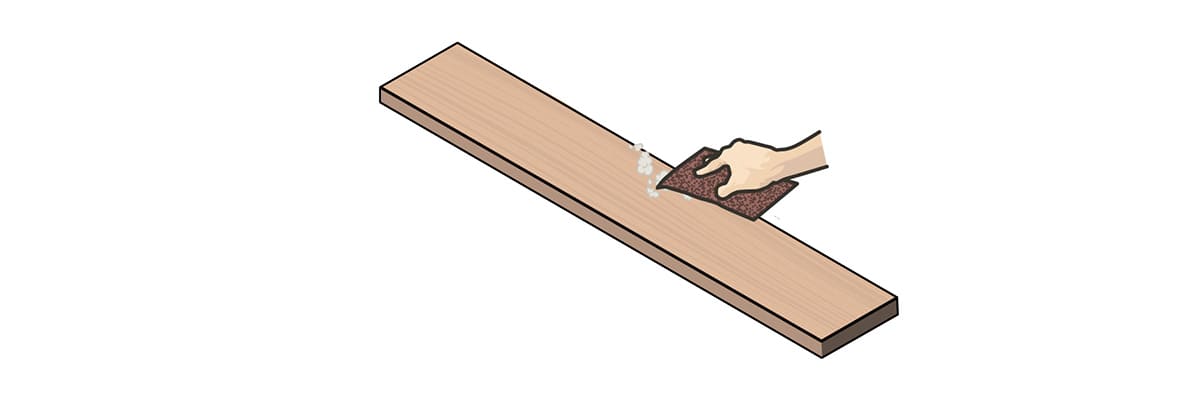
See if it is necessary to sand the 2 oak planks of 2m long, 38cm wide and 38mm thick, because a seat with roughness is not pleasant.
Discover all our advice to create a bench in perfect harmony with the planned dining table by click here.
STEP 6 – The bench
Choose the visible face and the face where the feet will be fixed. Once the choice has been determined, position the board so that the face where the feet will be fixed is under the eyes.
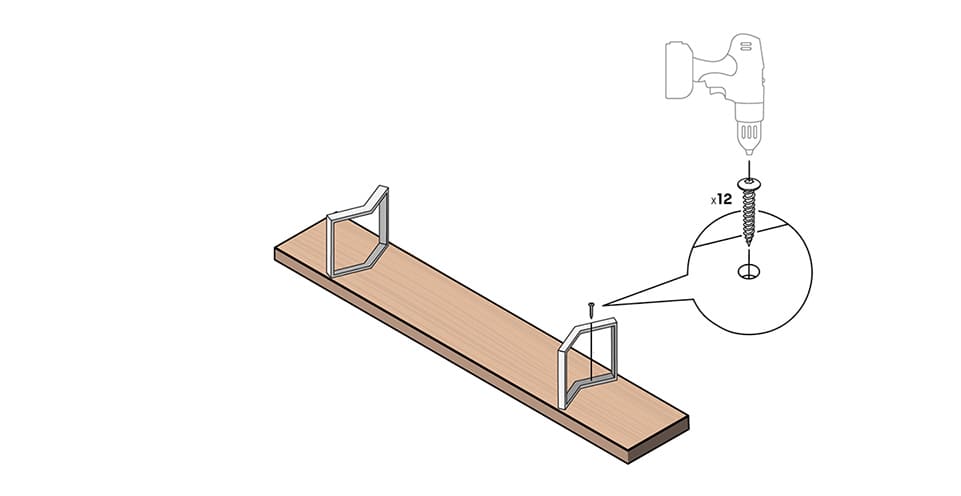
Arrange each foot M 40 cm 30 cm from the edge, making sure to center them in relation to the width. Fix the feet using the 45 mm hinge screws and the screwdriver
STEP 7 – The bench
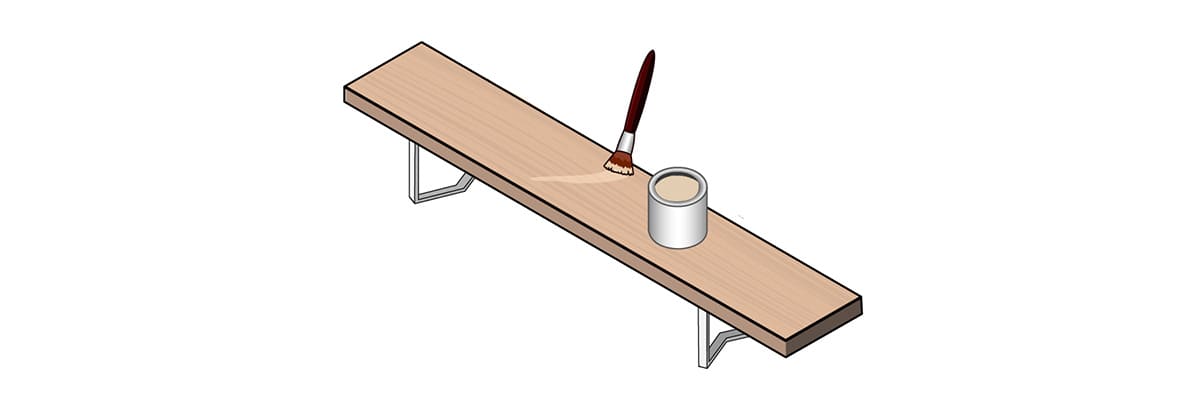
Protect the 2 boards with a translucent varnish using a brush. Leave to dry for the indicated time.
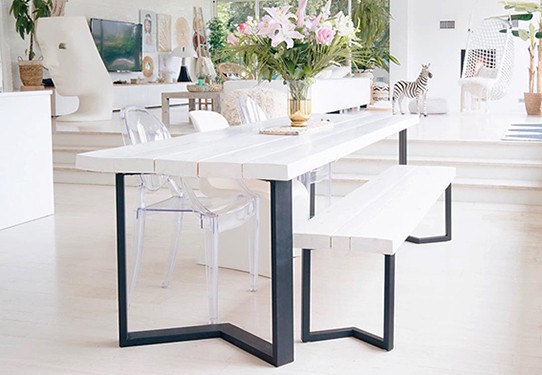
THE RESULT
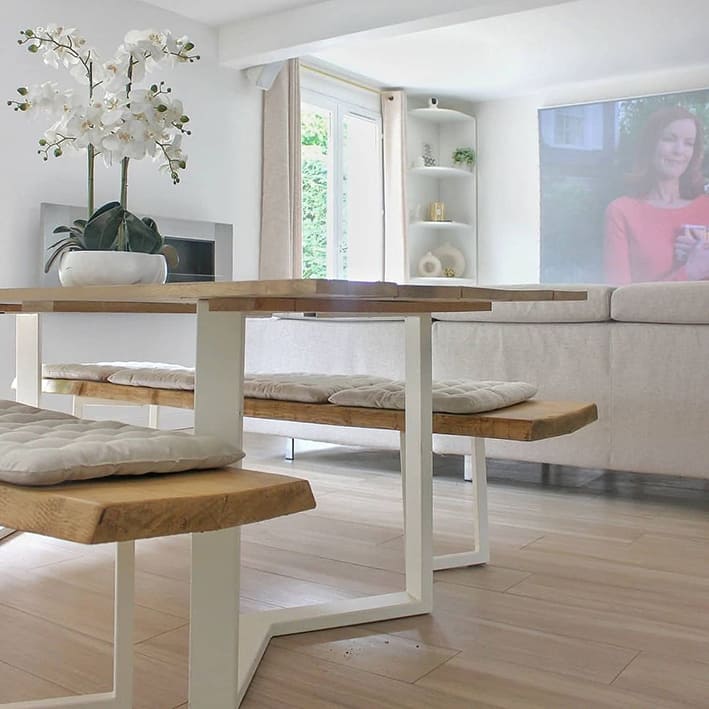
Crédits photos : @elow.home
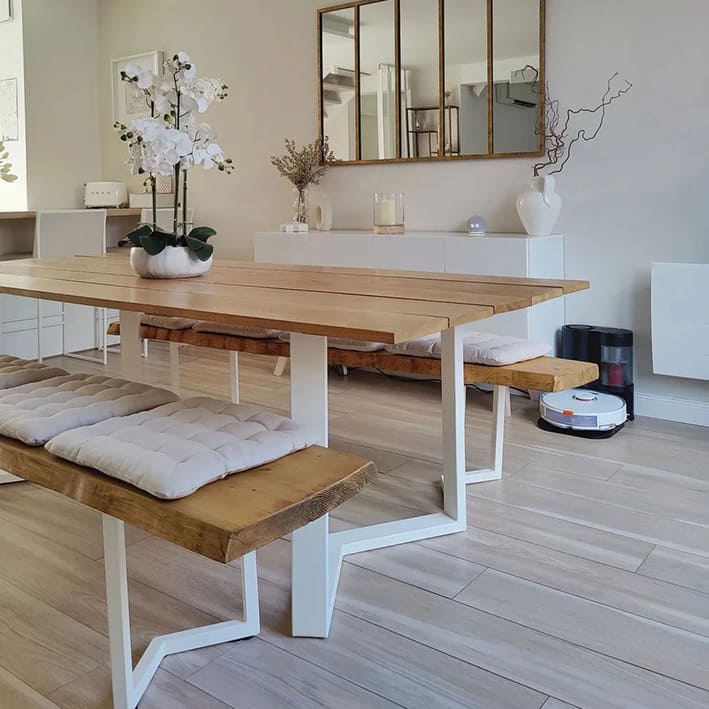
Crédits photos : @elow.home
Crédits photos : @elow.home

Crédits photos : @elow.home
To discover other DIY, It's here that it happens.
Here, Elodie has chosen to harmonize the legs of the table and the 2 benches in addition to the color. This creates harmony in the room. In addition, the profiles used to create its legs are not identical, which is interesting because the proportion of the furniture is not the same. Thus the bench keeps a certain lightness compared to the table.
It is quite possible to choose 2 different models for 2 creations next to each other. The important thing is to find a guiding line in the decoration, like starting with the same color. Discover 12 bench ideas to inspire you.
A bench can put off because there is no backrest. When choosing furniture for a room, ask yourself what it will be used for and how it will be used. If the table is ultimately little used, creating a bench with a cushion to make the seat more comfortable is more than enough. !
Related posts
-
 HOW TO MAKE YOUR DINING TABLE YOURSELF?
The dining table is one of the centerpieces of the house, it will give character to your interior and will...
HOW TO MAKE YOUR DINING TABLE YOURSELF?
The dining table is one of the centerpieces of the house, it will give character to your interior and will... -
HOW TO MAKE A COFFEE COFFEE TABLE?
The coffee table is the center of the living room, where your evenings with family and friends will take place, where...
-
HOW TO MAKE A BEDSIDE TABLE WITH A BOX?
Are you desperately looking for a bedside cabinet without finding what you are looking for? We are offering you a DIY...
Leave a comment