


Blog navigation

 0
0
After presenting DIY to make dining tables, coffee tables, small furniture, desks and others , let's start making a wooden bar with metal legs!
This bar will be added to your interior in the living room or a dedicated space and with it new storage will be available. Practical and aesthetic, that's what we expect of him.
MATERIAL
- 9 wooden boxes 50x35x 23cm
- Screwdriver drill
- Strawberry kit
- 12 screws
- 12 Nuts
- 2 clamps
- 2 MDF boards 105 cm high by 23 cm wide by 1 cm thick
- 1 MDF board 155 cm high by 102 cm wide by 1 cm thick
- 4 brackets
- 5mm screws
- Brush x2
- Black paint
- Walnut
- Half-round (to be calculated according to the width of the half-round chosen)
- Wood glue
- Worktop 50 cm wide and 155 cm long
- 2 custom-made straight feet 105 cm in white
- 8 hinge screws of 20 mm
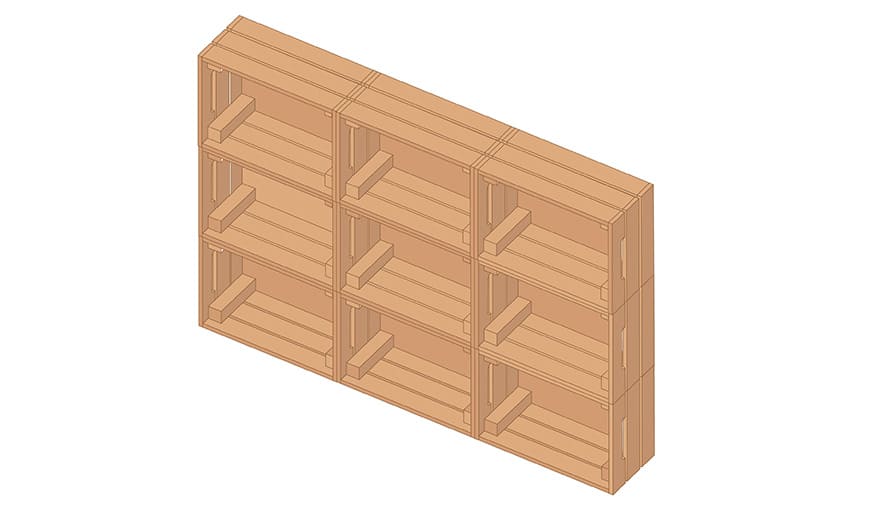
STEP 1
Arrange the boxes to obtain the base of the bar: 3 in width and 3 in height.
Each box must be tilted so that the hollow side is facing you and not facing the sky.
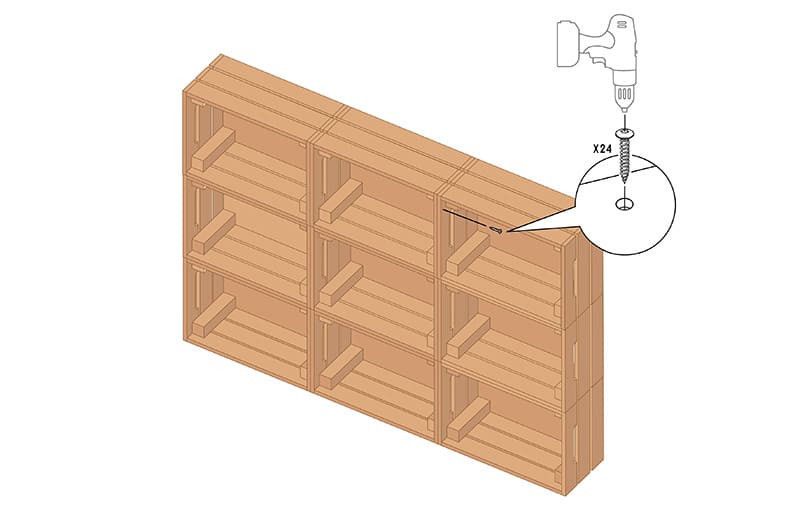
STEP 2
Fix the boxes to each other using screws and nuts.
Before going on to drilling, make sure to hold the 2 boxes, in the process of being fixed, using clamps and check the level of the latter.
Then, drill 2 holes as high as possible and those in each corner where the 2 boxes touch. Using screws and nuts, secure the boxes together.
Repeat this step for each new cabinet addition.
Tip : Fixing can also be done with glue. It makes the connection permanent.
STEP 3
The assembled boxes must be 105 cm high (i.e. 3 superimposed boxes), 150 cm wide (i.e. 3 boxes next to each other) and 23 cm deep.
It's time to dress up this crate set with MDF.
Lay the largest panel flat, on the ground and on each end, position the narrower panels, taking care to place the small panels on the large one so as not to see the edge of the small one.
The brackets are to be positioned 10 cm from each end. Thanks to them and 5mm screws, fix the assembly. This should create a U-shaped structure for you.
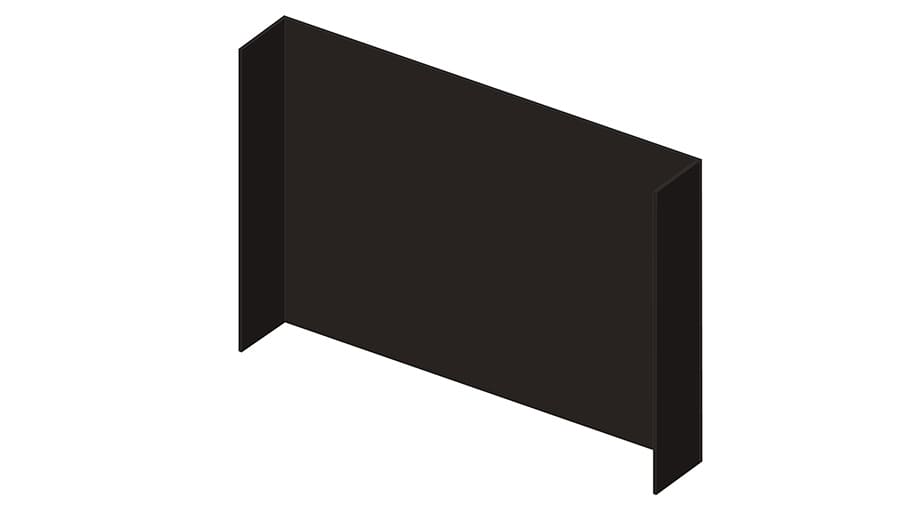
STEP 4
Paint the whole thing black. Leave to dry for the indicated time.
Tip : Why paint if it is then covered? If it turns out that there are holes or openwork places, the fact that the background is black, it will be less noticeable.
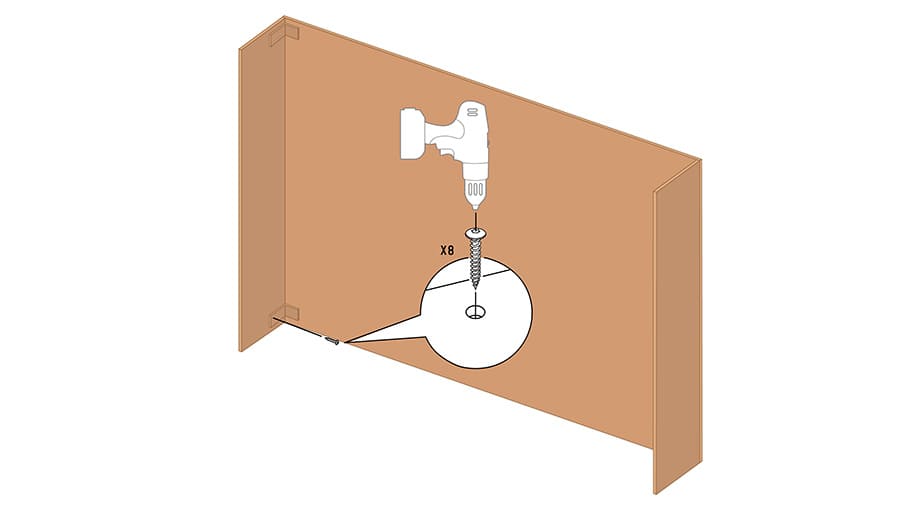
STEP 5
We are now going to attach this structure to the set of wooden crates by proceeding in the same way as fixing the crates to each other.
In addition to drilling, we will mill the MDF boards to accommodate the screw head and make it invisible on the exterior face. Thus the screws will not interfere when adding the half-round cleats.

STEP 6
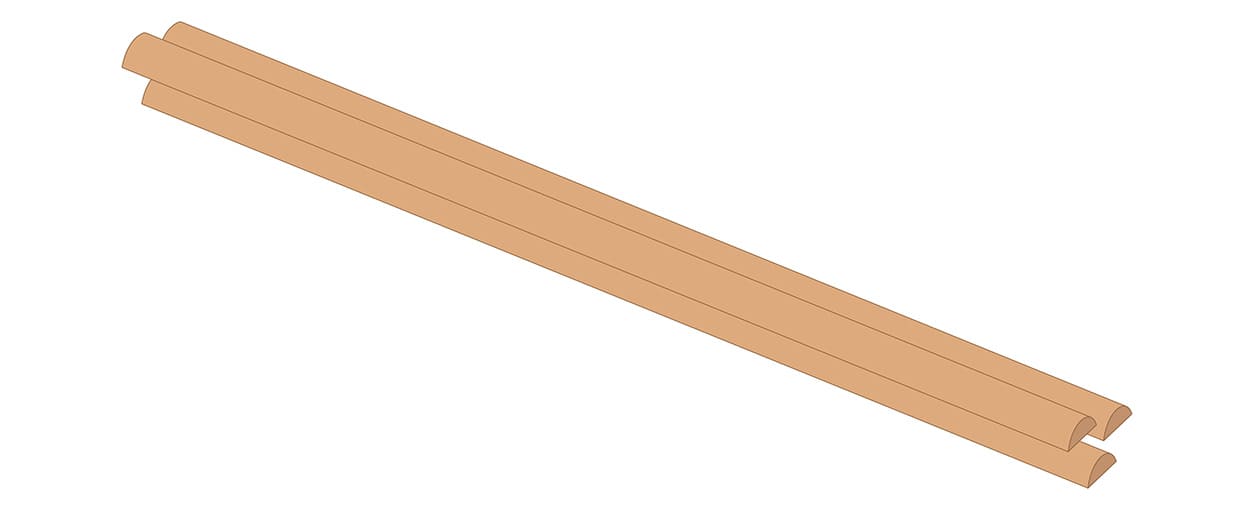
It's time to take care of the half-rounds. Depending on the width of the half circle chosen, calculate the number needed in relation to your length and height. DIY stores can cut them for you on the spot or you can do it yourself using a handsaw. Consider sanding the ends smooth so they stick to the furniture.
Before fixing them, we will paint them all to give a darker look to the wood while maintaining the designs of its essence thanks to the walnut stain. Leave to dry for the indicated time.
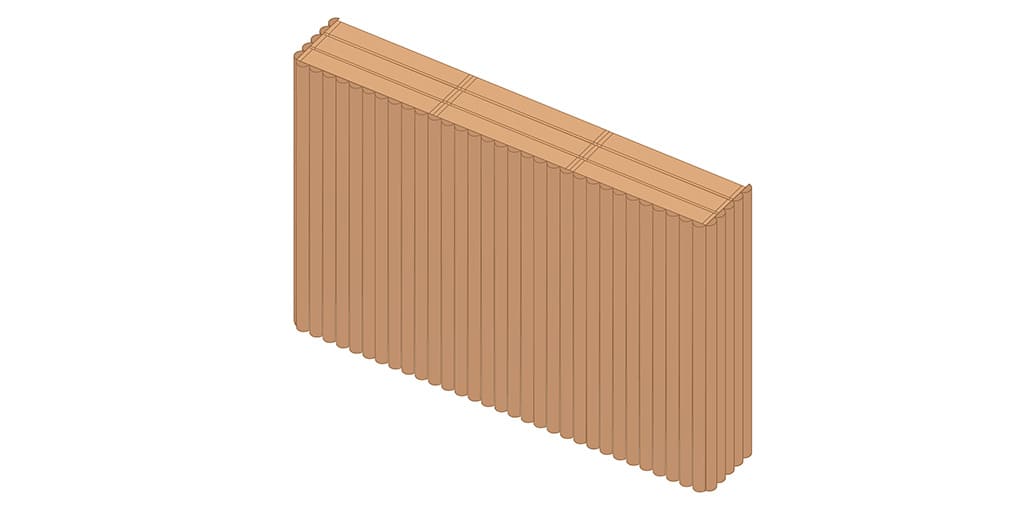
STEP 7
We are going to glue the half-rounds to the MDF panels. We advise you to start with the most conspicuous angle to ensure a successful finish.
To maximize the work of the glue, lay the furniture down so that the large painted MDF board is towards the ceiling.
Nothing could be simpler here, apply wood glue along each strip and place them on the structure. Repeat until you cover all 3 MDF boards.
For a perfect finish, do not hesitate to place it on the edge of the smallest MDF panel
Then let it dry for the indicated time.
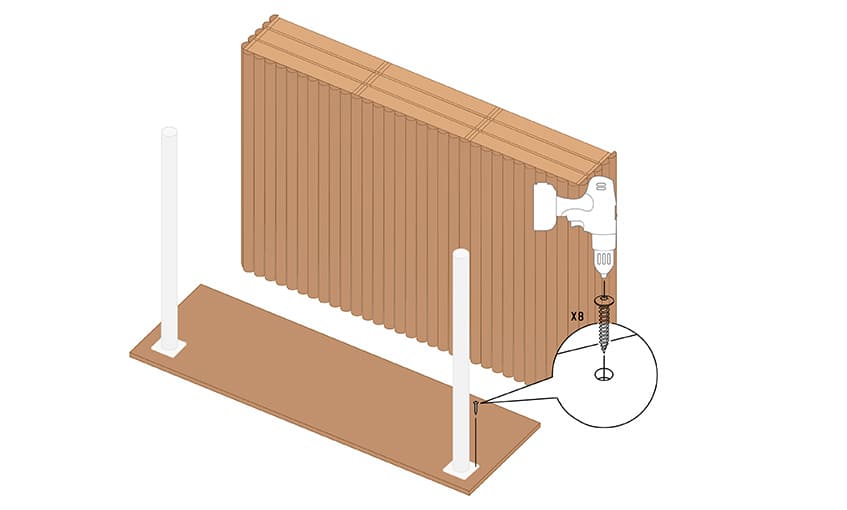
STEP 8
Let's take care of the work plan / tray that will take place on the bottom.
Lay the tray on the ground so that you have the side where the feet will be fixed in front of you.
Then, choose the location of the custom-made right feet then fix them using the screwdriver and hinge screws.
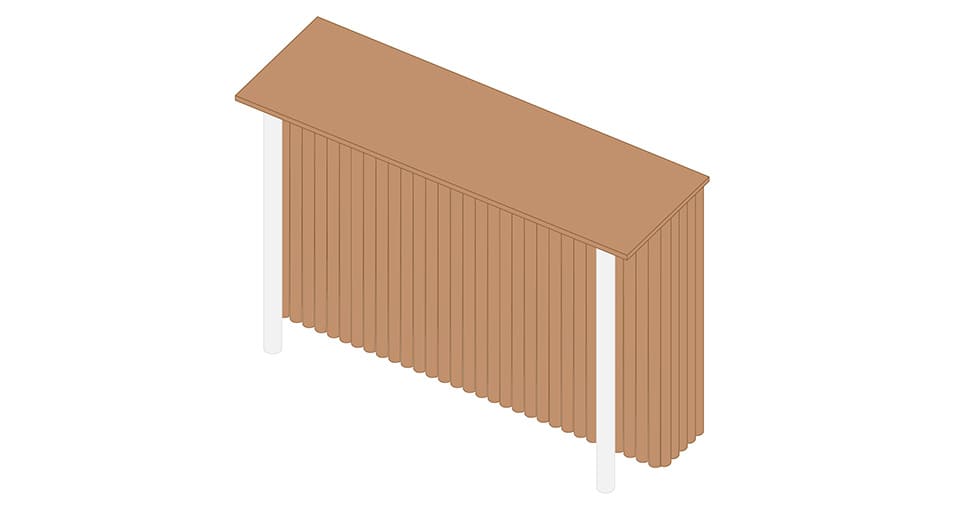
STEP 9
Turn the assembly over and place it on the cabinet with the crates. The end of the worktop must reach the end of the cabinets to overflow on the other side and rest on the feet.
Underneath the wooden crates, fix the worktop and the latter together using a screwdriver and hinge screws.
THE RESULTAT
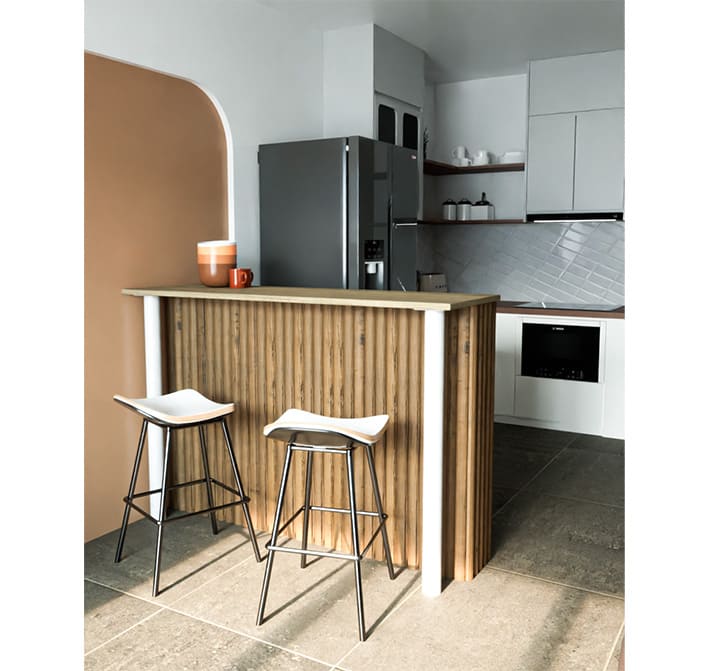
Here you are with a design bar, made by your hands! It is available with a cabinet with a closed door that fits easily into a kitchen. It's up to you to play with its composition to make it practical in your interior and according to the space available.
Related posts
-
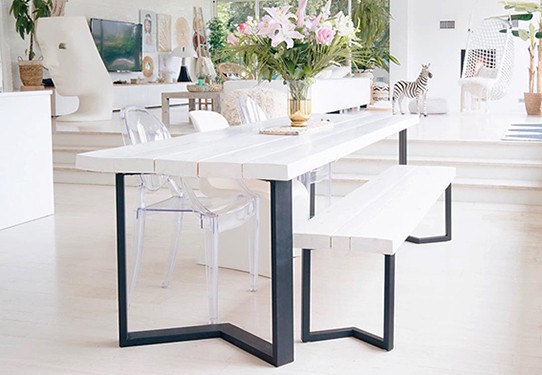
 HOW TO MAKE YOUR DINING TABLE YOURSELF?
The dining table is one of the centerpieces of the house, it will give character to your interior and will...
HOW TO MAKE YOUR DINING TABLE YOURSELF?
The dining table is one of the centerpieces of the house, it will give character to your interior and will... -
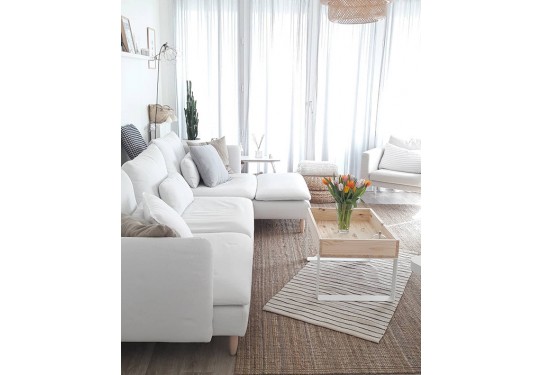
HOW TO MAKE A COFFEE COFFEE TABLE?
The coffee table is the center of the living room, where your evenings with family and friends will take place, where...
-
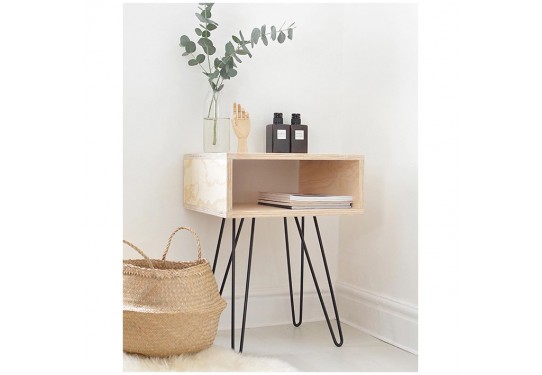
HOW TO MAKE A BEDSIDE TABLE WITH A BOX?
Are you desperately looking for a bedside cabinet without finding what you are looking for? We are offering you a DIY...
Leave a comment