


Blog navigation

 0
0
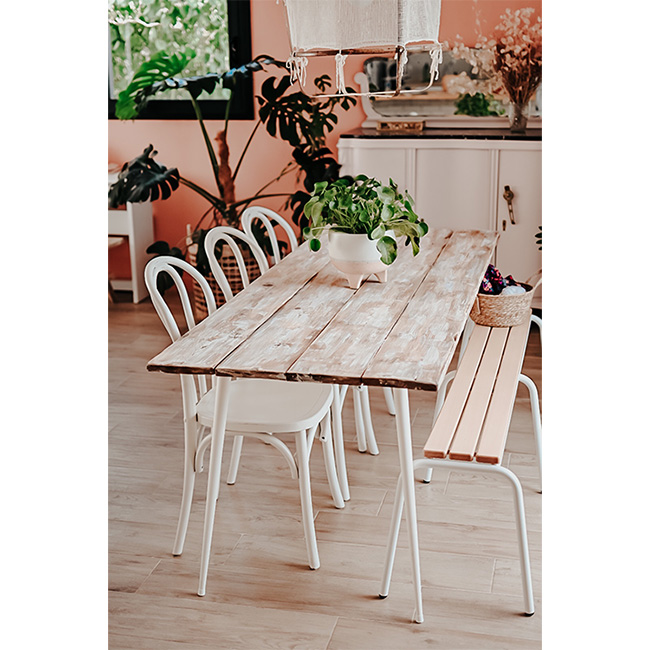
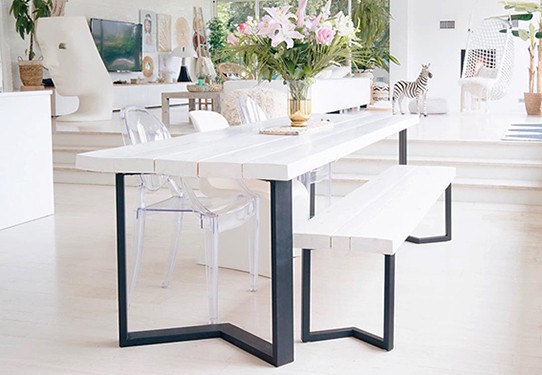
@zessfr created a dining table with an aged look by making the top herself. The manufactured dining table has character with its aged look and gives a new atmosphere to the dining room. Indeed, the classic piece of furniture that is the dining table is 100% personalized in order to fit into Jess's decoration. It fits perfectly into her dining room and she combines it with a bench and old chairs.
The dining table you are about to make measures 2m long by 80cm wide, for a total cost of around 250 €.
MATERIAL
- 4 pine formwork boards measuring 2m x 20cm, 2.7cm thick
- 3 flat iron reinforcements 70 cm long
- Wood screws
- Medium grit (80) and fine grit (150) sanding paper
- Walnut husk
- A tea towel
- White acrylic
- Colorless matte varnish
- Brush
- 4 conical legs 71 cm
- Screwdriver
- 16 hinge screws 20 mm
DIY PROCEDURES
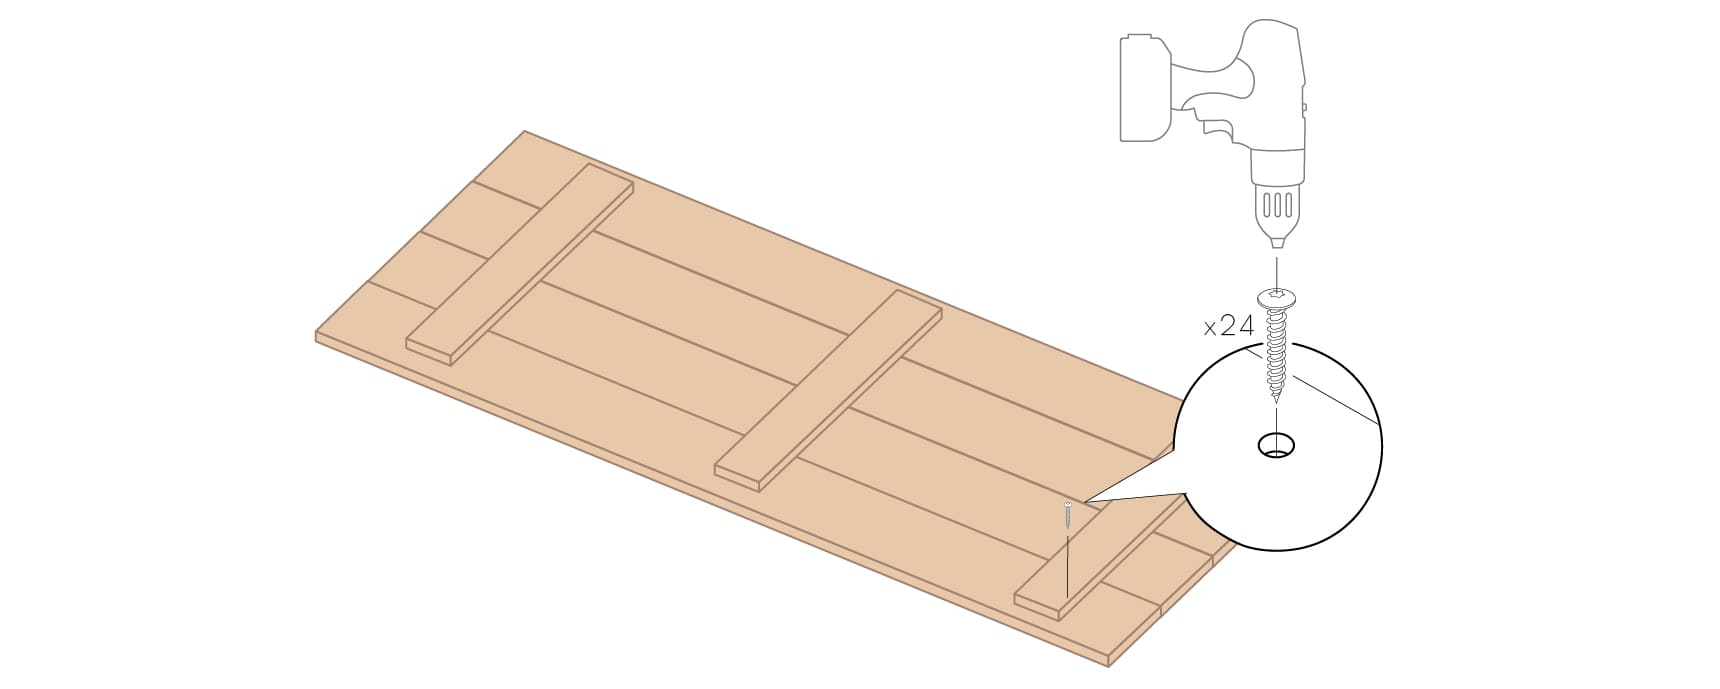
STEP 1
Let's make the table top. Arrange the 4 boards next to each other, taking care to align them.
Position the reinforcements: 1 at each end and 1 in the center. Secure them using wood screws and a screwdriver.
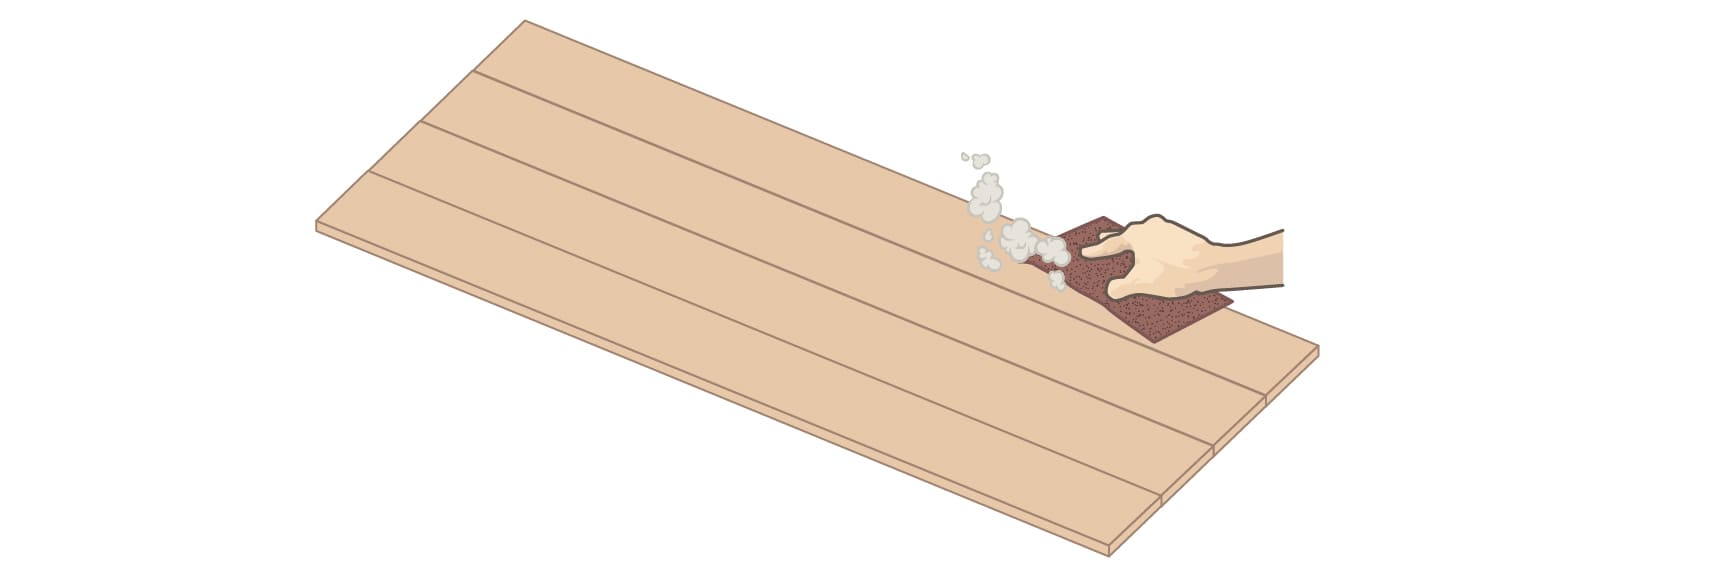
STEP 2
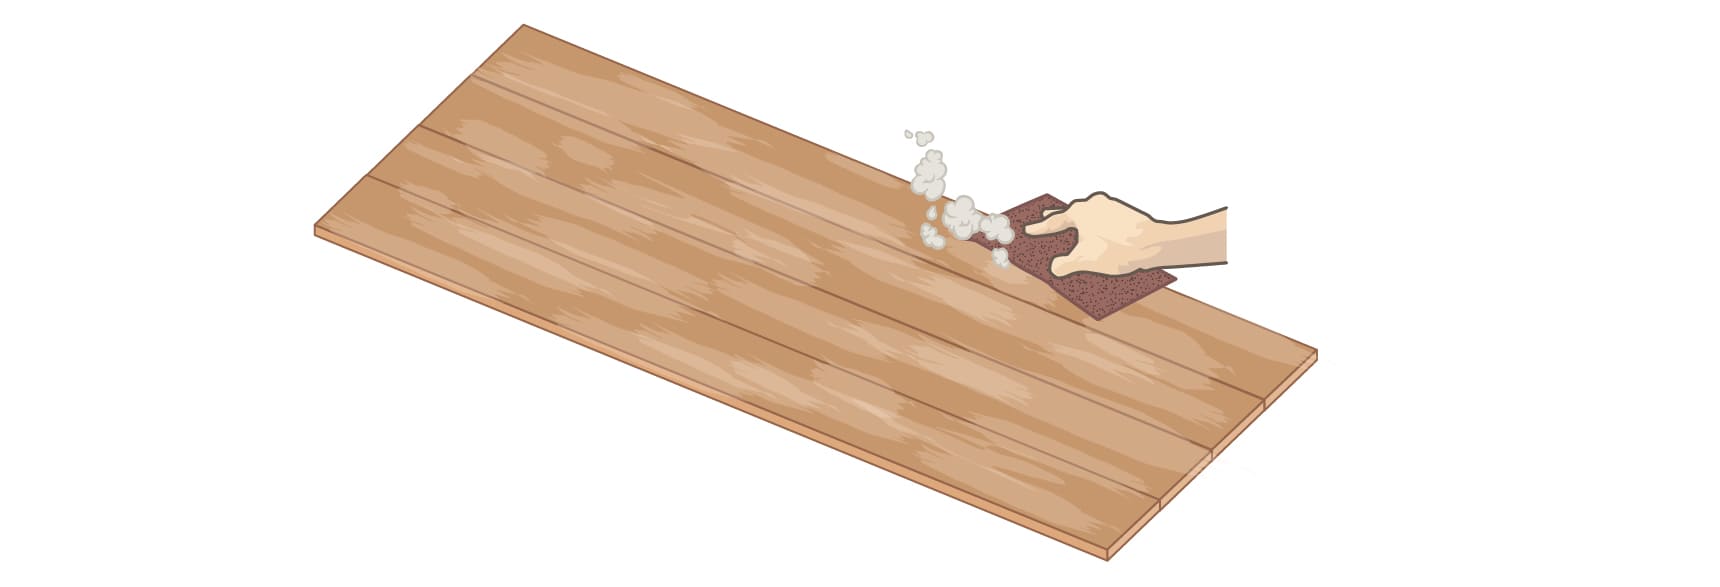
It's time to sand the board. Start with the medium grit (80) then the smallest (150).
Dust off the dust between sanding and don't forget the sides.
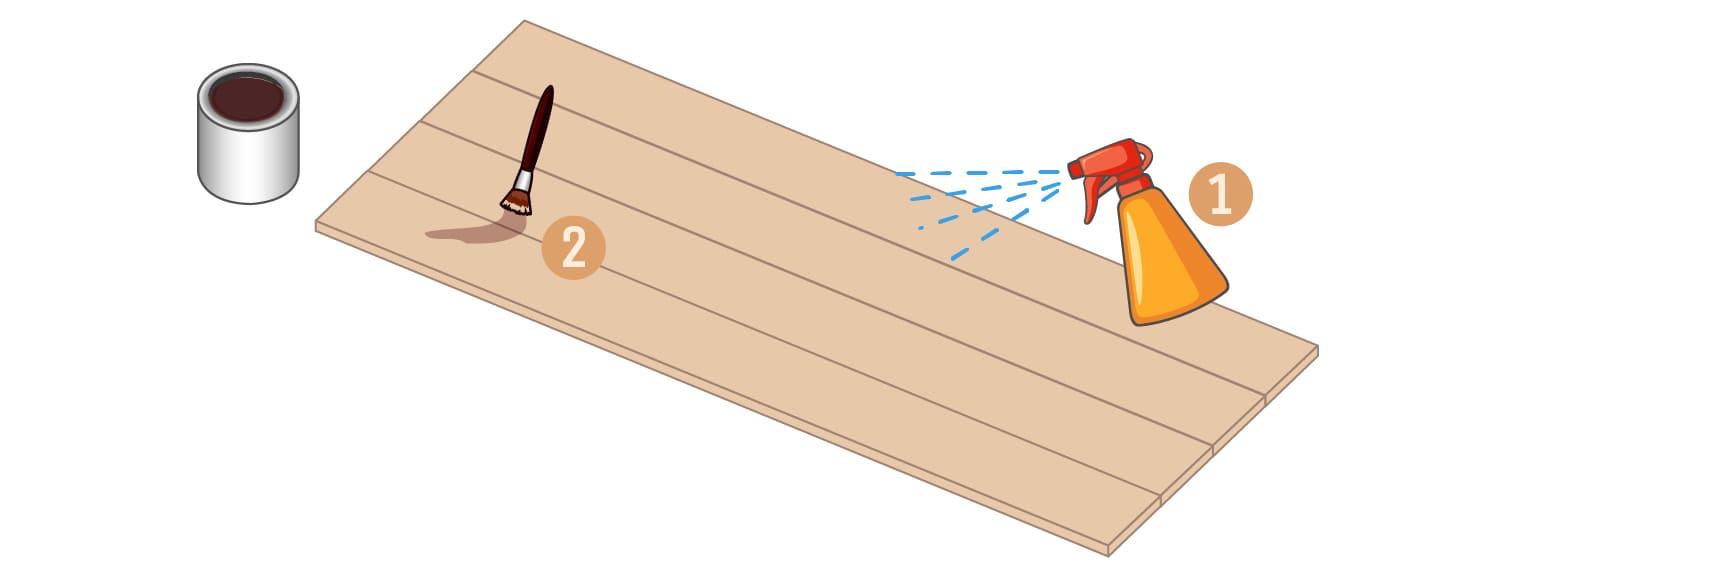
STEP 3
It's time to apply a first coat of color using walnut husks.
To do this, moisten the tray using a spray bottle. Let's take care of the mixture: with so much husk and water. Using a brush, apply the mixture, taking care to remove the excess with a cloth.
Let it dry and then apply a second coat.
Tip: humidifying the tray beforehand allows for a lighter and less pronounced. We're not trying to get a uniform shade here.
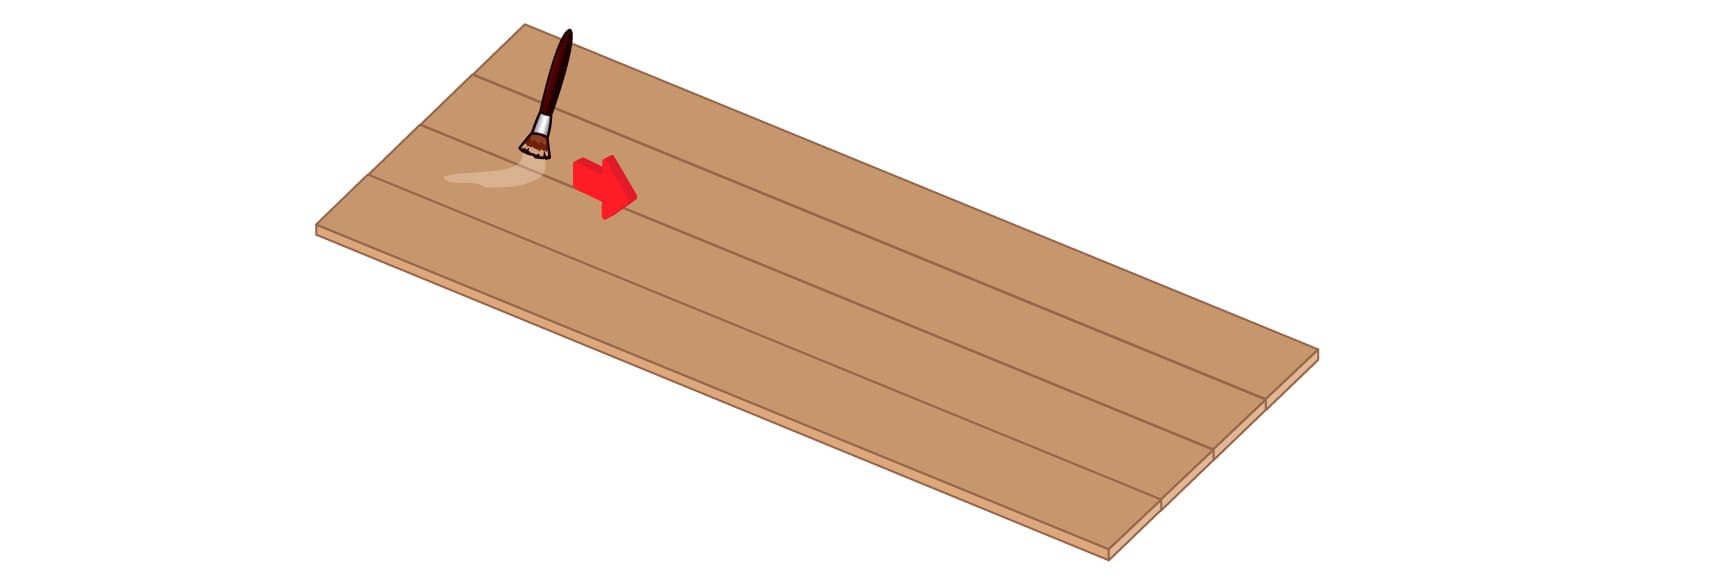
STEP 4
Let's move on to the patina using acrylic paint. With a new brush, take some paint, be careful not to overload the brush. Stretch it as much as possible by applying it in the direction of the wood. Blend the effect by wiping with a cloth for a softer finish.
Do not apply paint to the entire tray. The idea is to create a non-uniform effect.
STEP 5
It's time to sand again using a coarse grain in places to bring out the walnut husk and the color natural pine boards.
And then sand again with small grain paper for finishing.
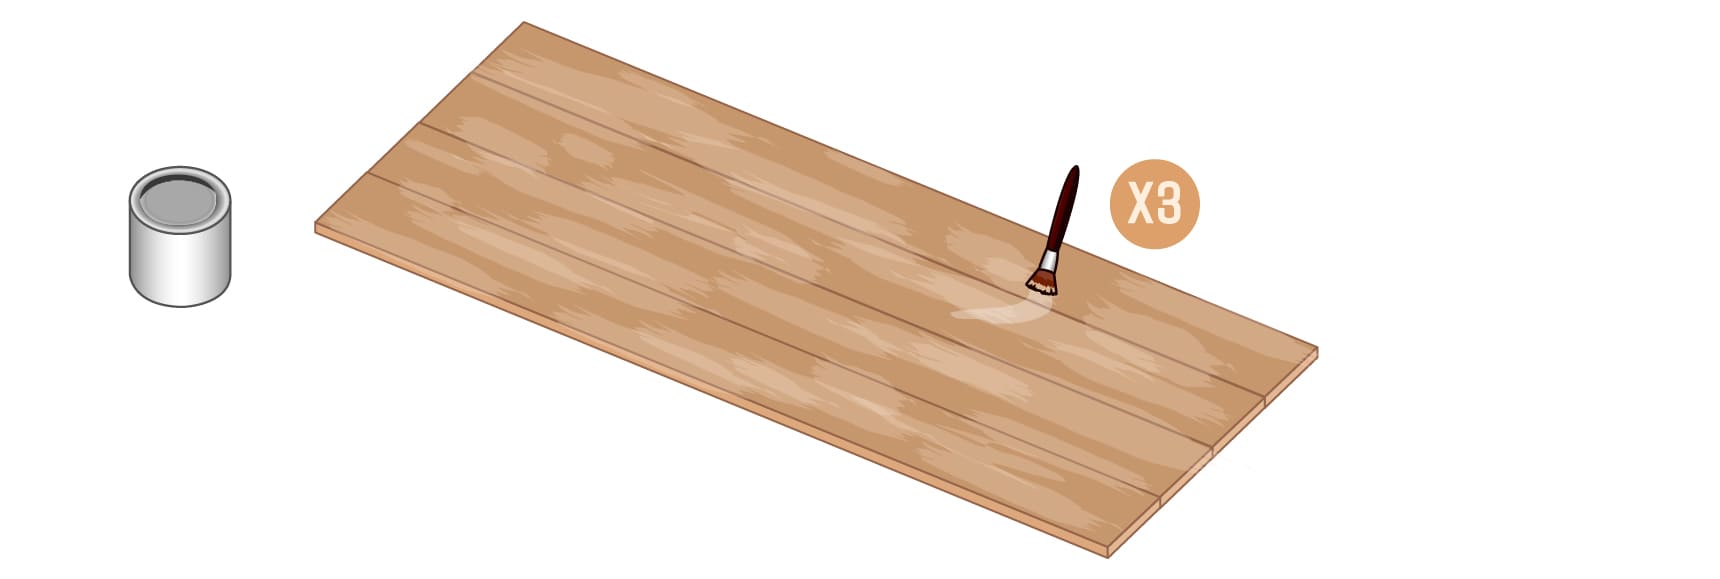
STEP 6
It's time to varnish the top with colorless varnish, applying 3 coats. Allow to dry between each coat.
Tip: varnish both the front part of the tray and the back part in order to protect the 'entire set.
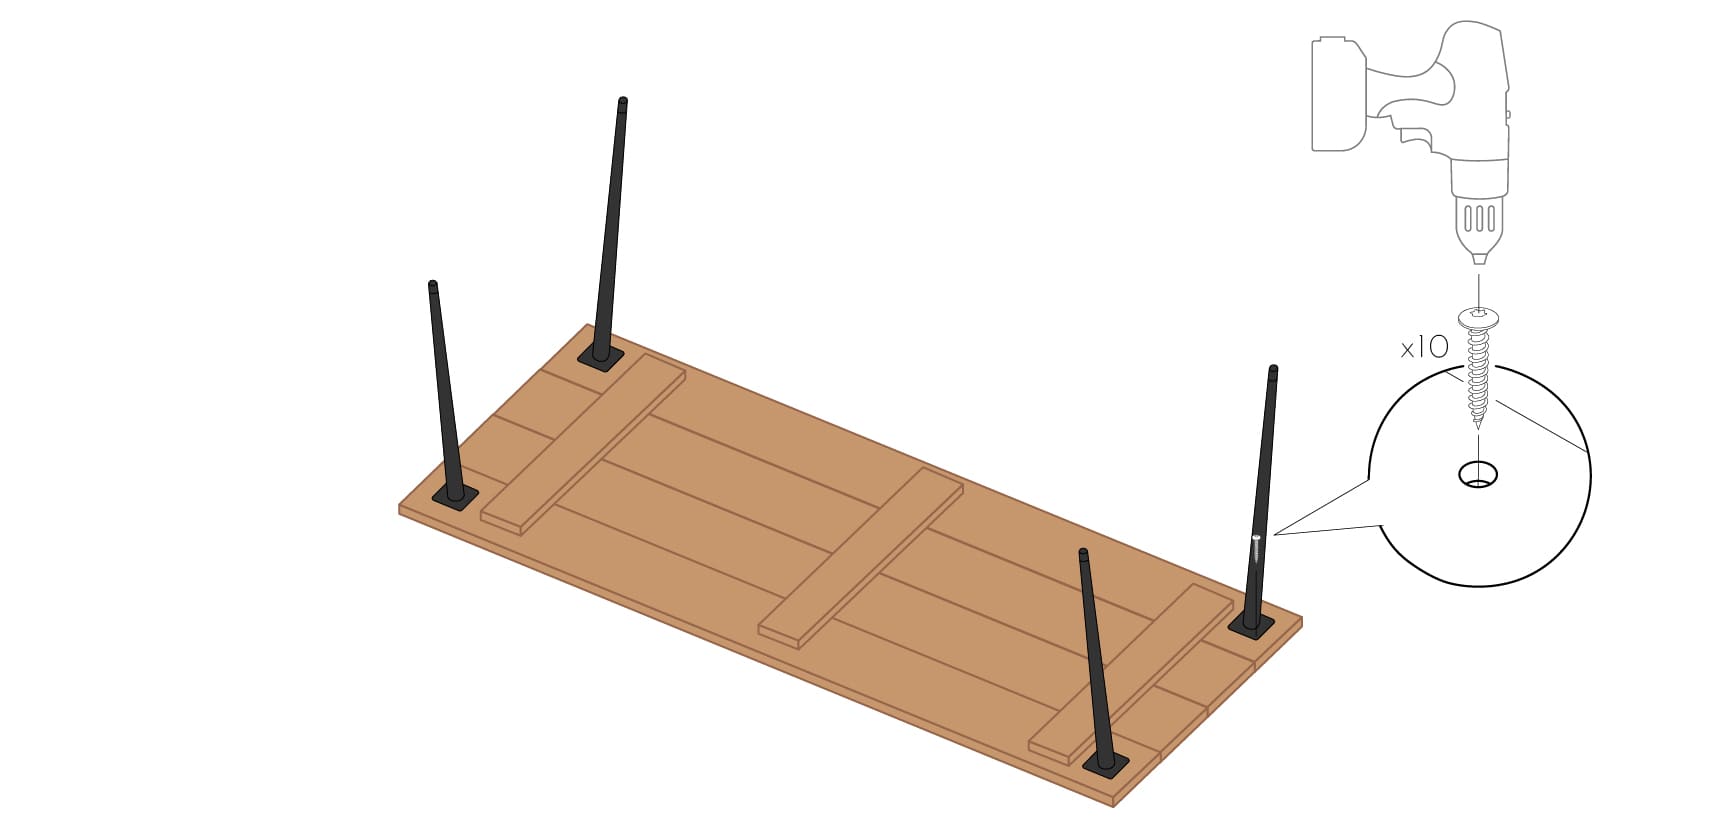
STEP 7
The board is ready, it's time to position the feet.
Position the feet, taking care not to put them on the edge at the risk of causing the toe of the foot to protrude outside the platform.
THE RESULT
This DIY is more complex and will take a little time. All the steps serve to give a unique appearance to the board as it ages. You will be proud to say that you created your dining table from A to Z. Now it's up to you.
Feel free to adapt the dimensions and choice of feet according to your needs and tastes.
Find on our DIY page, other DIYs that may match your search.
Related posts
-
 HOW TO MAKE YOUR DINING TABLE YOURSELF?
The dining table is one of the centerpieces of the house, it will give character to your interior and will...
HOW TO MAKE YOUR DINING TABLE YOURSELF?
The dining table is one of the centerpieces of the house, it will give character to your interior and will... -
HOW TO MAKE A COFFEE COFFEE TABLE?
The coffee table is the center of the living room, where your evenings with family and friends will take place, where...
-
HOW TO MAKE A BEDSIDE TABLE WITH A BOX?
Are you desperately looking for a bedside cabinet without finding what you are looking for? We are offering you a DIY...
Leave a comment